The purpose of this workflow is to demonstrate the configuration process and test-taking from the LMS through the LTI protocol. The LMS emulator will be used.
Creating an integration #
To create an integration in the YouTestMe application:
- Select the Settings/Integrations tab and select the LTI settings tab.
- Click the Create new button.
- Enter the name of the integration.
- Optionally enter a description.
- Select whether you want the integration to be enabled or disabled.
- Click the Save button.
The new integration is created. The information displayed in the dialog will be needed to set the integration in LMS.
Important information is:
- Consumer key.
- Secret key.
- Message URL.
When the LTI integration is created, you can choose from the Actions column options to edit or remove the integration.
Upon selecting the Edit option, you can preview and modify the integration details, including the integration name, description, and status.
Consumer key, Secret key, and Message URL will be used for external content configuration in the ILIAS.
Creating a test #
The next important step is to create a test.
You can check the following link for help with the test creation.
It is important to create active self-enrollment sessions and publish the test to allow test-taking through LMS.
Important information is the test ID and a testing session ID since you can set integration to assign the candidates to the testing session directly or give them access to the test where they can select in which testing session they want to start the test.
To see the test ID, open the desired test, select the Tests/Manage tests/Settings tab, and see the ID in the Test ID field.
To see the testing session ID:
- Select the Schedule button of the desired test.

Note: This can be done through the Testing center/Testing sessions tab by selecting the desired test. - Check the ID in the Session ID column.
More information on how to set both integration settings will be explained below.
LMS Configuration #
For the demonstration, LMS Emulator will be used.
- Access https://saltire.lti.app/platform.
- Navigate to the Security Model tab.
- In the Message URL field, enter the Message URL text from the YouTestMe application.
- In the Consumer key field, enter the Consumer key text from the YouTestMe application.
- In the Shared secret field, enter the Secret key text from the YouTestMe application.
- Click the Save button on the top left corner.
Allow access to the test #
To give candidates access to the test where they can choose in which testing session they want to start the test you should do the following:
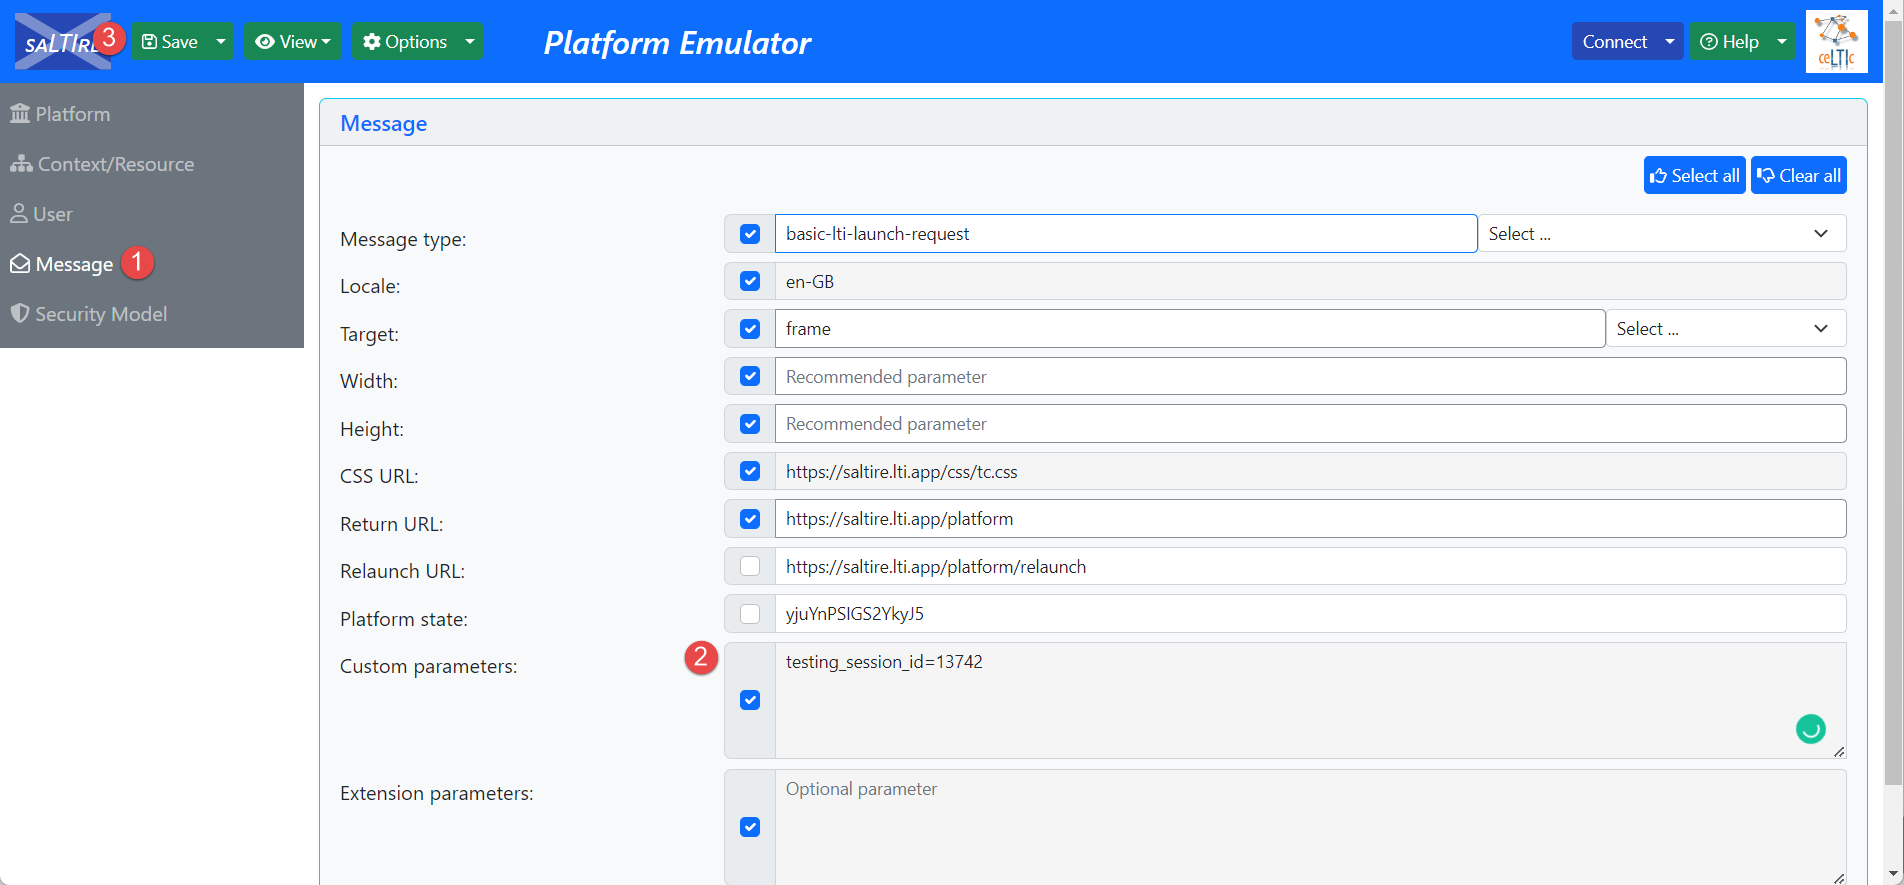
- Navigate to the Message tab.
- In the Custom parameters field, enter the test_id=desired_test_id.
- Click the Save button.
Once the integration is set, a candidate can start the test. To start the test, click the Connect button in the top left corner.
The candidate will be redirected to the YouTestMe application, where they can start the test. If there are few testing sessions, the candidate should click the Choose testing session button to choose the desired one to start the test. Otherwise, the candidate should only click the Book button to book the available session.
Once the test is completed, the candidate may be redirected to the personal report (depending on the test settings), and once checked, the candidate can sign out by clicking the button in the top right corner.
Once signed out, the candidate will be redirected to the LMS page.
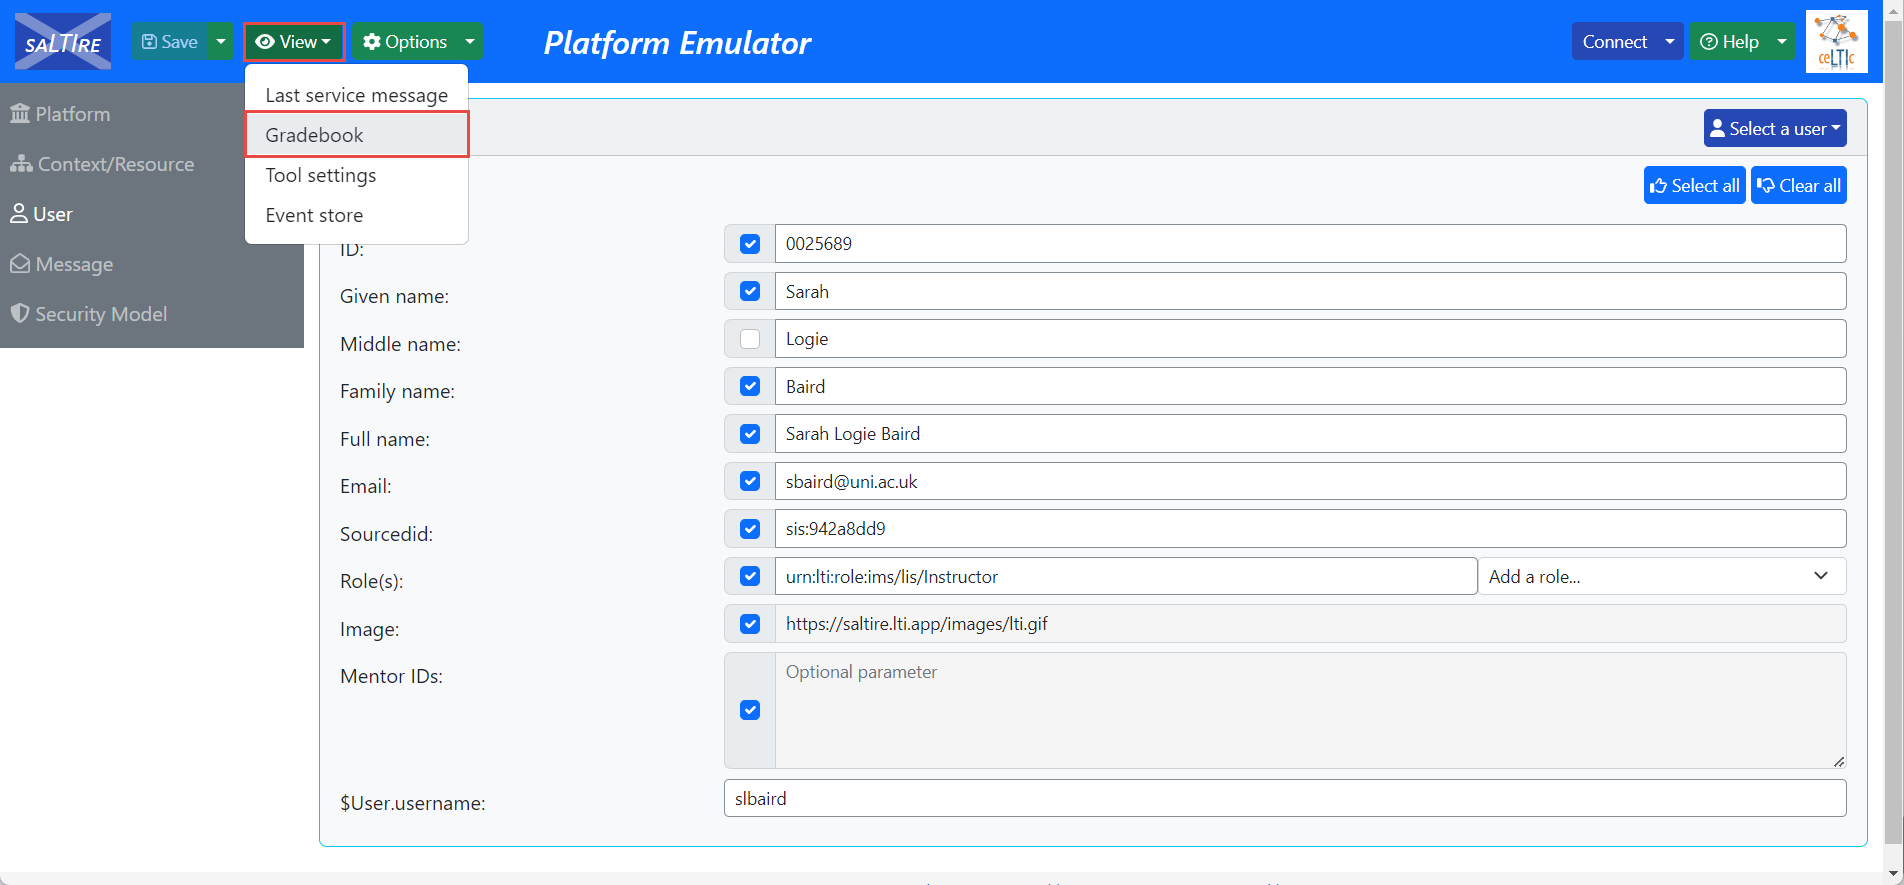
The candidate can access their report by clicking the “View” button, then “Gradebook”.
Allow access to the testing session directly #
To give candidates access to the testing session directly, you should do the following:
- Navigate to the Message tab.
- In the Custom parameters field, enter the testng_session_id=desired_testing_session_id.
- Click the Save button.
Once the integration is set, a candidate can start the test. To start the test, click the Connect button in the top left corner.
The candidate will be redirected to the YouTestMe application, where they can start the test. Since the candidate has already been assigned to the testing session, they will have the Start button. The rest of the process is the same as for the first scenario.


