This article explains the process of creating a customized testing session and manually adding students to it. By following these steps, you can assign a test tailored to your specific requirements to the relevant candidates.
Create a test #
For more information on how to do that, check out this article.
Creating testing session #
Creating a testing session allows you to schedule and organize candidates for a specific exam or test. It provides a convenient and organized way for candidates to take their tests and can be a great way to manage large groups of test-takers.
After completing the Test creation Wizard, select the Testing sessions tab.
There are two ways to create new testing sessions:
- Click on the New testing session button to create a new session.
- Click on the Load testing sessions button to use the predefined Excel template.
When creating the test, the pop-up window will appear where you should follow the define the following options:
- Enter the Testing session name.
- Location – choose one of the previously defined testing locations. This field is optional. If you need more information on how to create a new testing location, please visit Testing locations.
- Time zone – the field displays the time zone of the user creating the session. The dates and times below are defined according to this time zone.
- Availability – enter the start and end dates and the time when the session will be available to the user.
- Assign to group – If you enable this option, only users from a specified group can enroll in the session. After selecting the group, you can manually select which members of the group have access to the session, or you can enable self-enrollment to grant access to the entire group.
- Session room – To provide additional information about the testing location, you can add a session room description. Enabling the Assign to training option restricts the test to only start from the selected training course.
- Candidate self-enrolment – if you enable the Candidate self-enrollment option, the Show booking settings option will appear. The booking deadlines can be set manually or automatically. To set the booking deadline manually, select the booking deadline for this session and define the date until the candidates can book assignments. For more information on how to set the booking deadline automatically, please read How to Auto-Set Booking and Cancellation Deadlines Using Test Delivery Preference. You will also be able to set the following:
- Additional instructions – you can add additional instruction, an optional label for a detailed explanation of finding the physical or virtual location of the session.
- Capacity – limit the number of candidates in this session.
- Authorization required – test attempt authorization allows the user to book a session to take a specific exam. The authorization must be created for every user individually.
Click on Show additional settings:
- Locked – if the Locked option is enabled, a user can start the test only by entering the “Session password”. The test managers and proctors can see the session password.
- Guest access permitted – Enabling the Guest link permitted option provides unauthorized users with access to take a test or survey via a guest access link. When accessed, a new guest profile is created, and the user is redirected to the test or survey. The system will automatically delete the guest user profile upon sign-out or when the HTTP session expires.
- External ID – optional ID that is used for integration with external systems.
- External name – an optional name used for integration with external systems.
- Data source – the name of the external system.
- Click the Save button to save a session.
- Click the Cancel button to cancel a session.
Assigning candidates to a testing session #
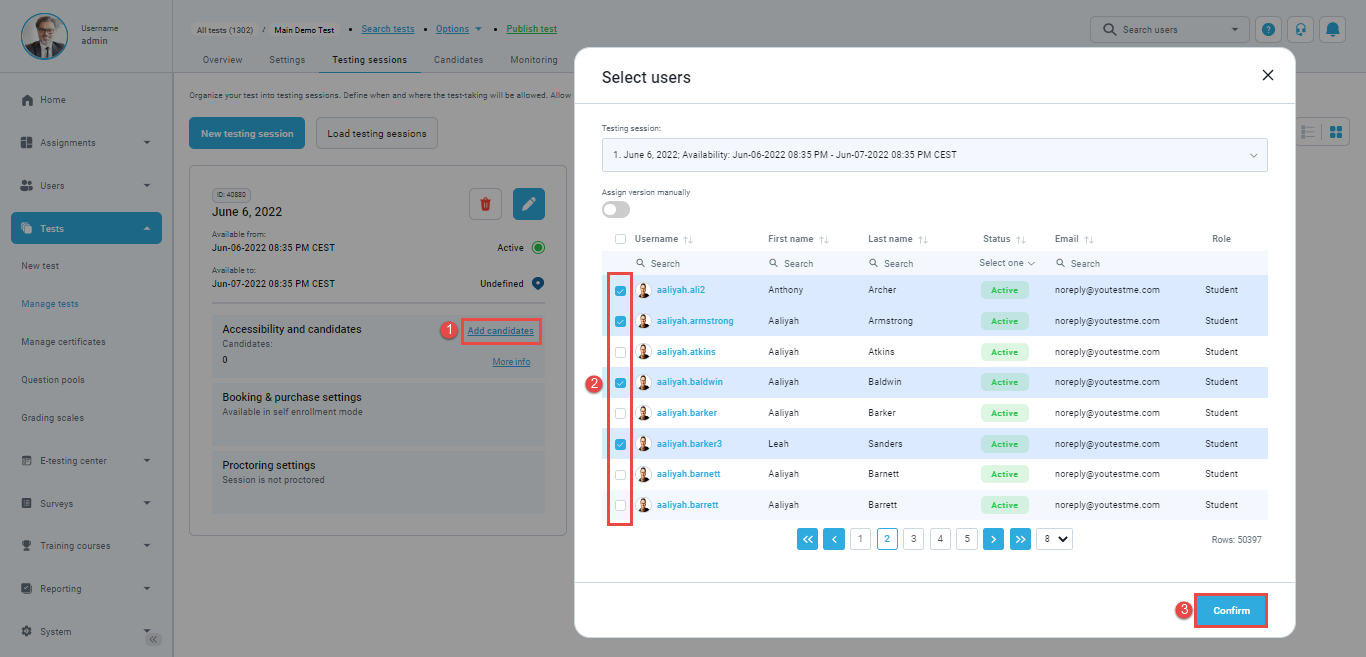
If the Candidate self-enrollment option is disabled, you should add the candidates to the desired testing session by following the next steps:
- Click on Add candidates.
- Select the candidates you want to add.
- Click on the Confirm button.
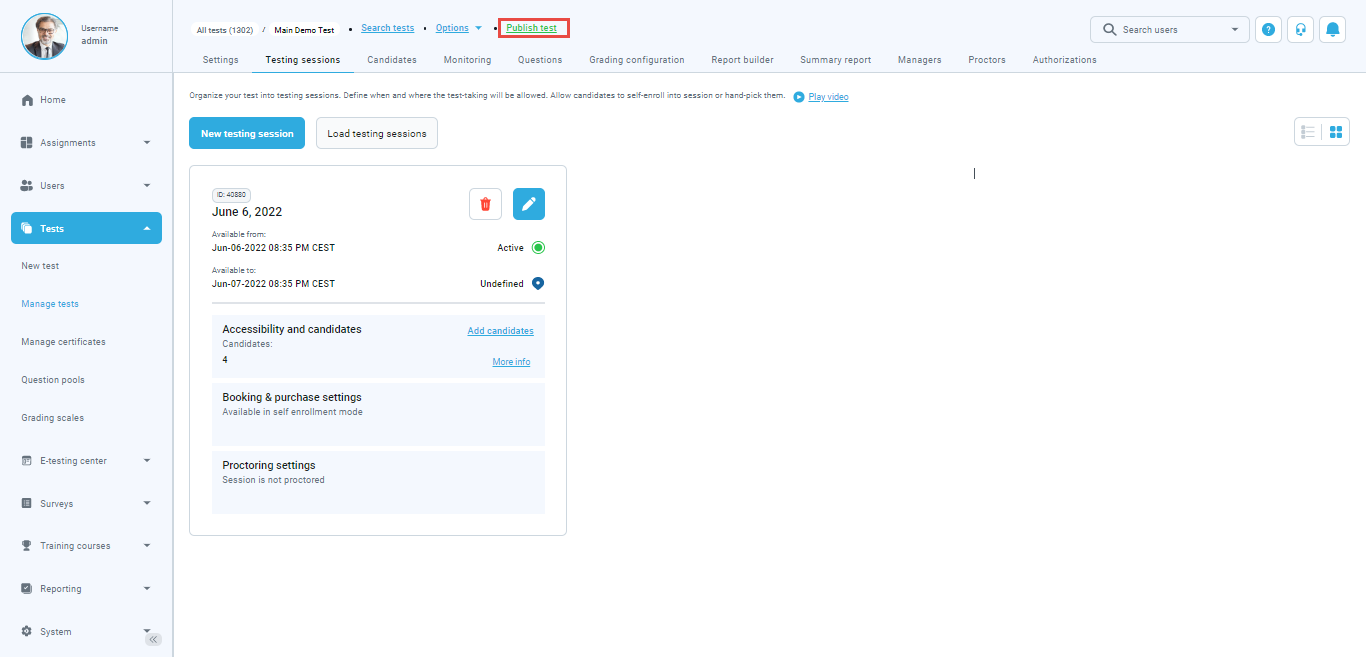
Publish test #
Once you finish the test creation, the test needs to be published so the candidates can start the test.
FAQ #
#1 How to assign a candidate to multiple sessions with the same exam? #
Regrettably, it is impossible to add a user to multiple sessions within the same exam after completion.
Instead, you can suspend their previous attempt and assign them to the new session.
To achieve this, locate the user’s prior attempt in the system and suspend it.
Once their previous attempt is suspended, you can then assign them to the new session within the same exam.
Enabling the Show suspended attempts filter allows viewing the user’s previous results even after their attempt has been suspended.


