Article verified for Release 15.1 on December 22, 2025.
This article explains how to create and use question groups within a test. It guides you through the steps to organize questions under a shared group, add a group title, and include optional text or multimedia that will be displayed above each question in the group.
Creating a question group
The question group allows you to organize multiple questions into a group and add a short description and multimedia (image, audio, video), which are displayed with each question within the group.
During Test Creation
Once you add the questions you want in the test via the Add questions tab, you can assign an appropriate group to each of them.
Note: Question groups can only be added to the test.
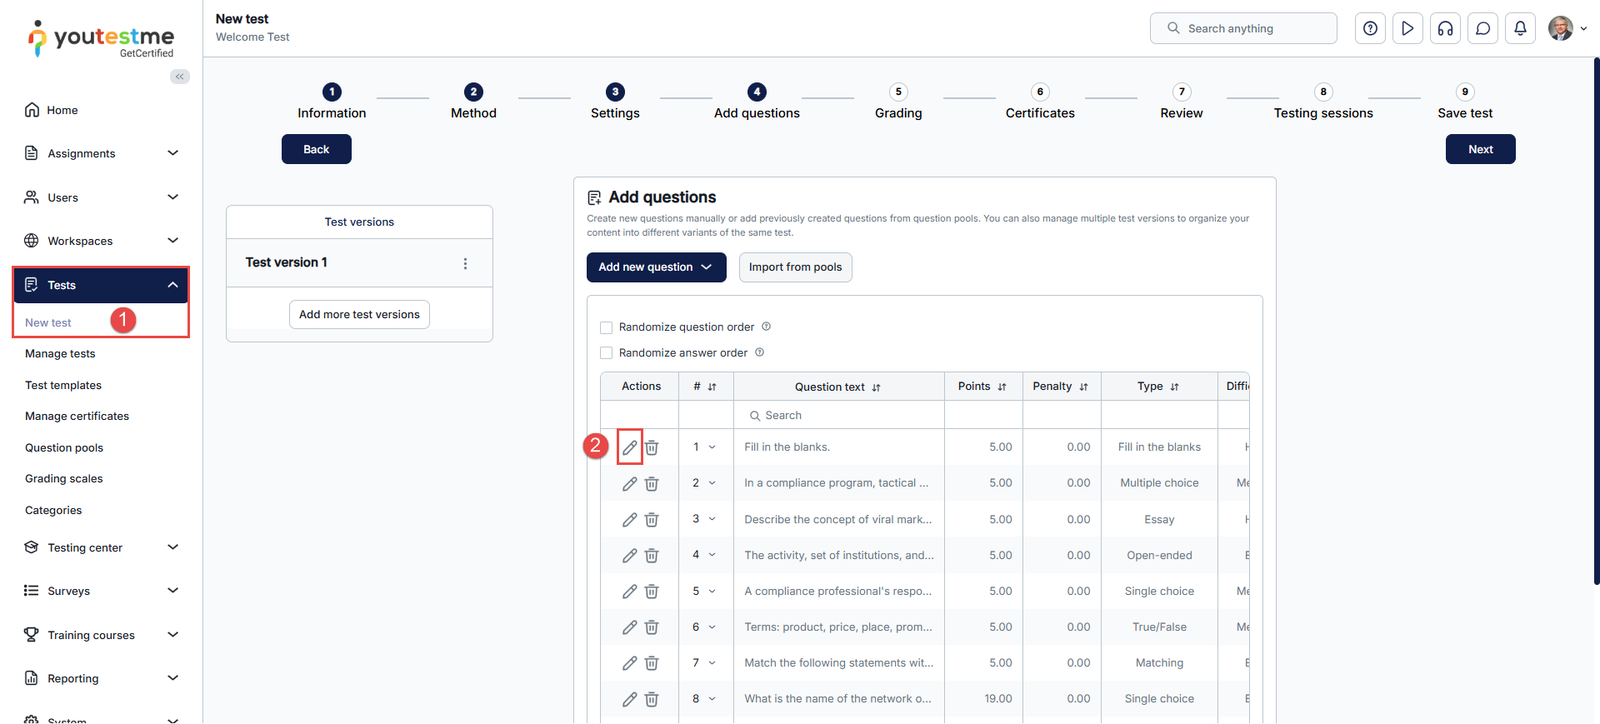
- In the main menu, select Tests and navigate to the New Test tab.
- Open the desired question in the fourth step of the test creation wizard by clicking the Edit icon.
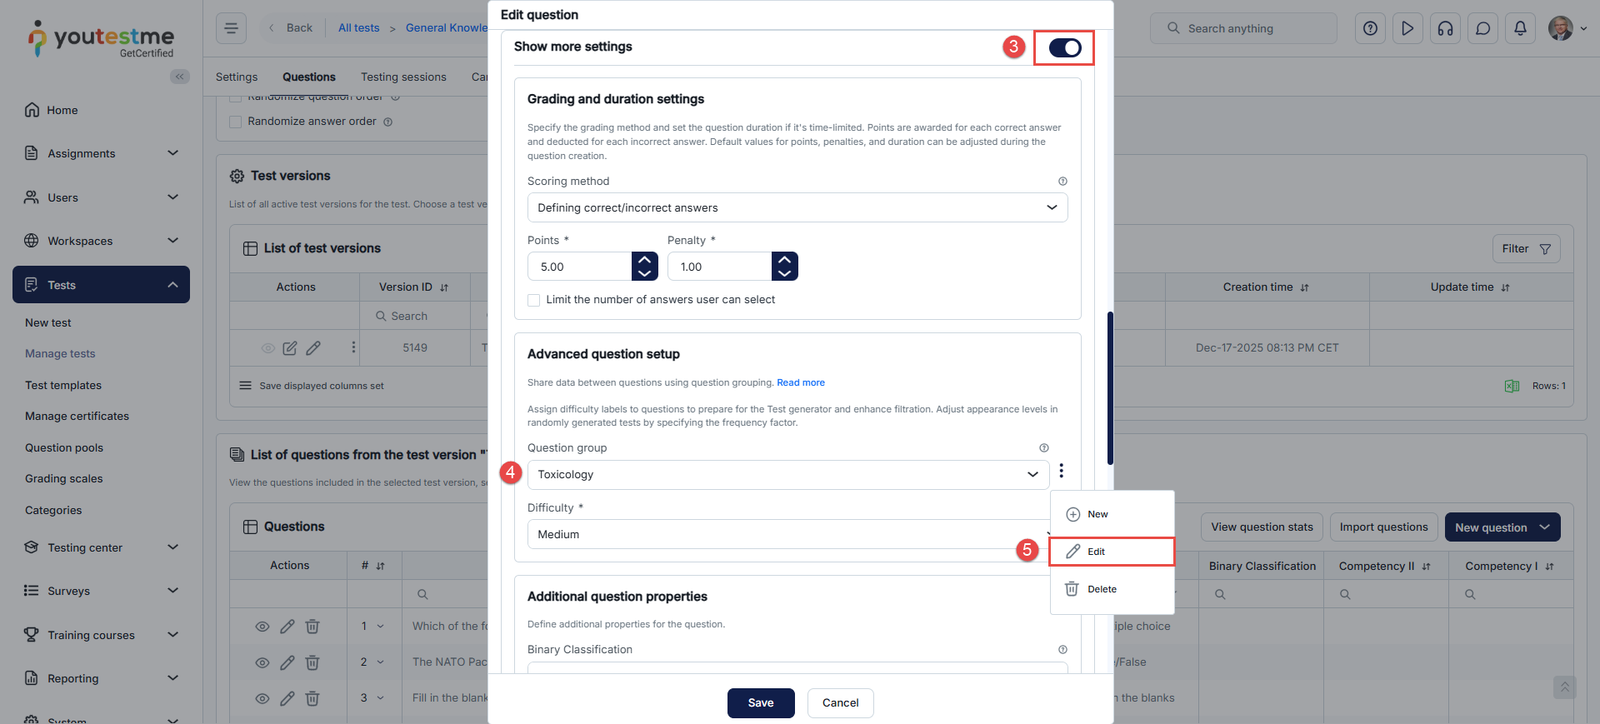
- Next, click the Show more settings.
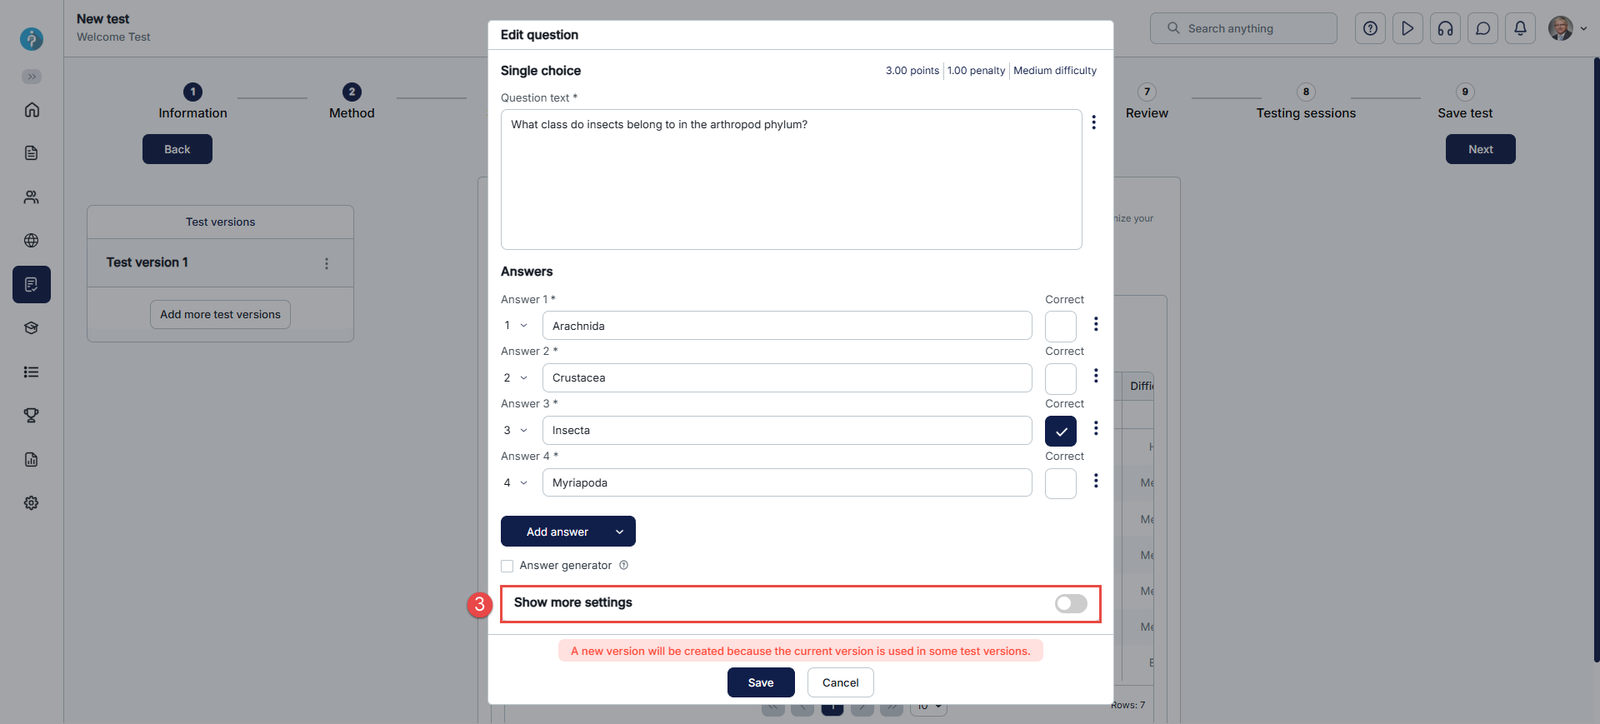
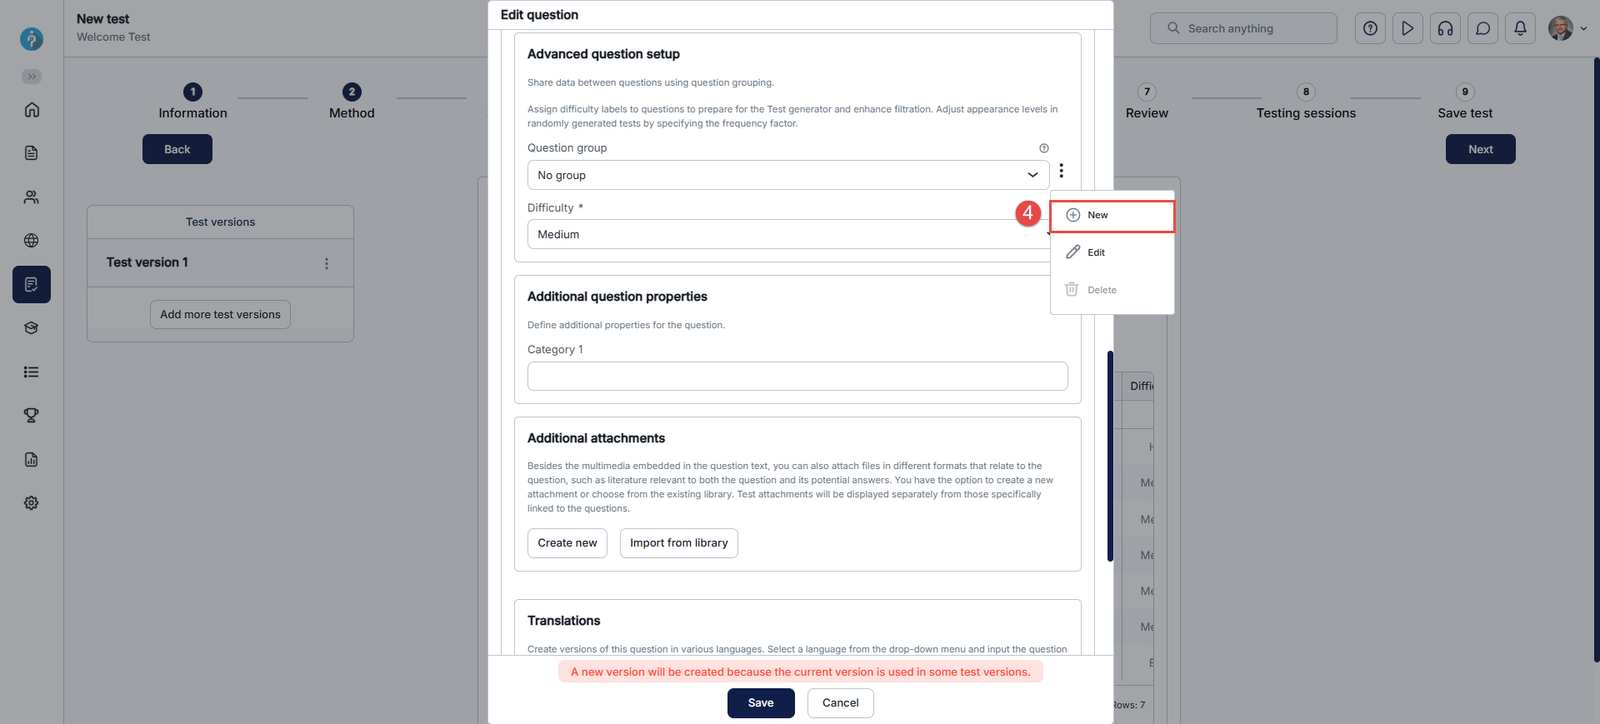
- Now scroll down to the Question group option, click the vertical three-dots icon, and then click New.
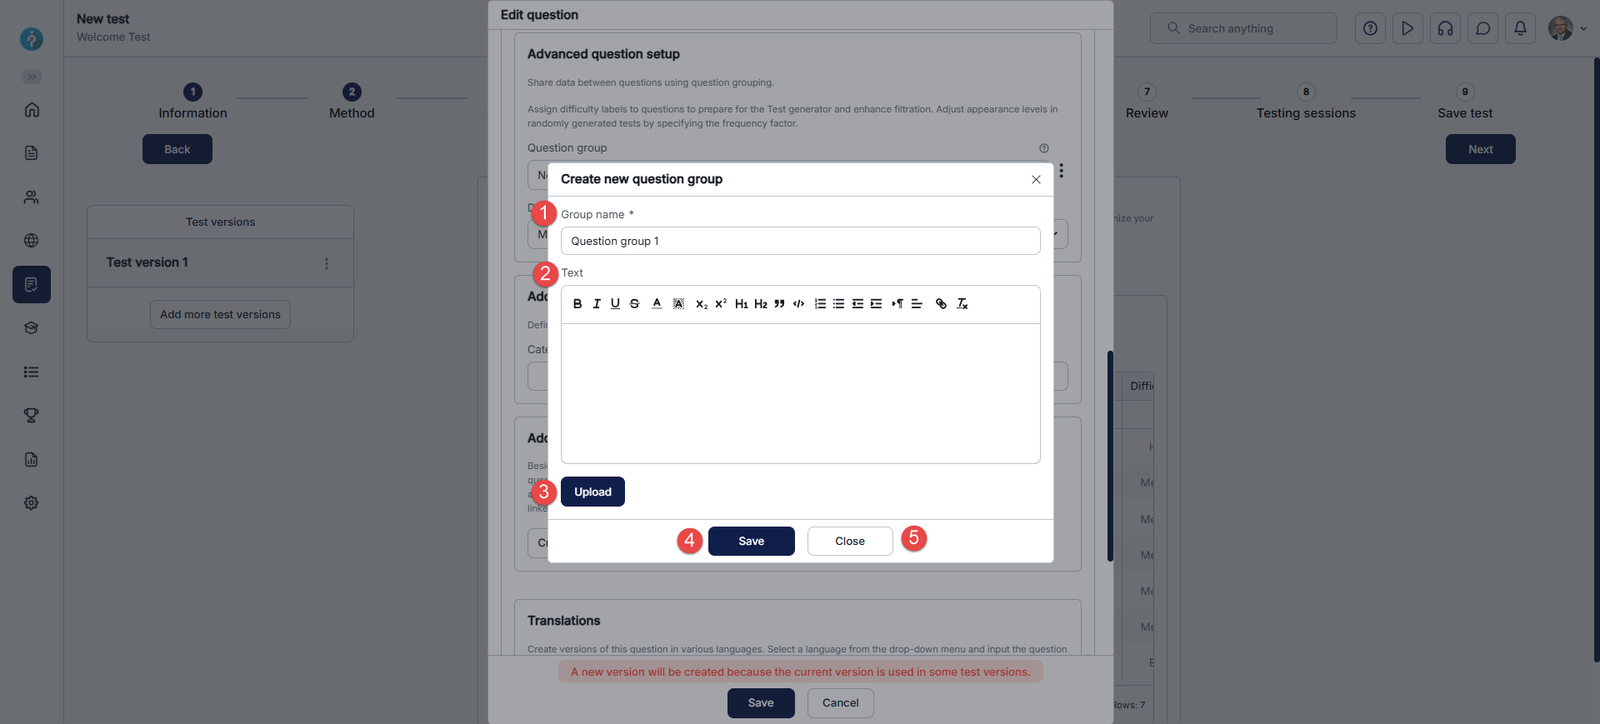
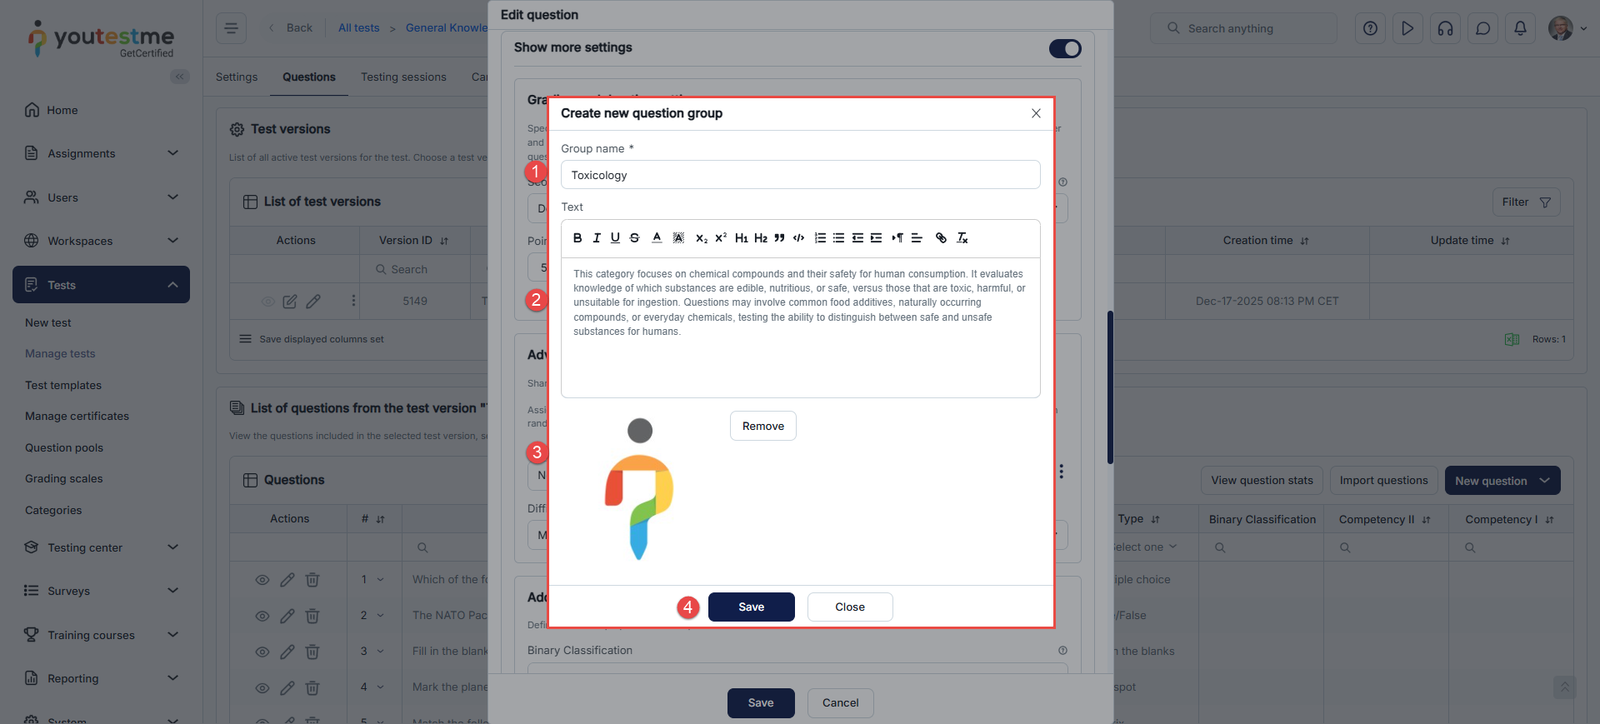
- At this point, a pop-up will appear where you can:
- Define the Group name.
- Text that will be displayed above each of the questions within that group (optionally).
- Upload a file that will be displayed above each of the questions within that group (optionally).
- Save the new question group.
- Close the pop-up window.
From Manually Created Tests
After manually creating a test, you can organize its questions by assigning each one to a relevant question group via the Questions tab.
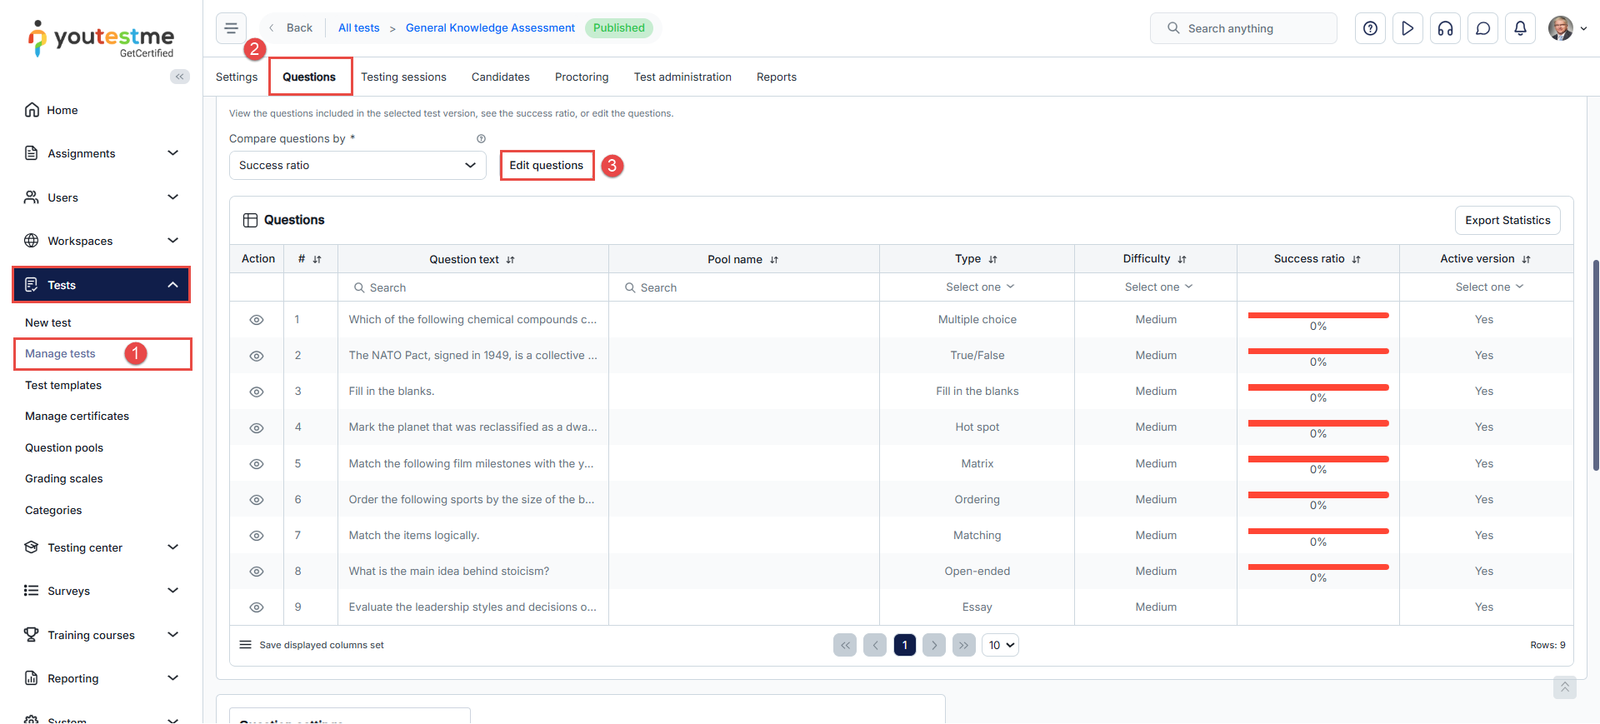
- Go to Tests and navigate to the Manage Tests tab.
- Open the test, and navigate to the Questions tab.
- Click Edit Questions and select the specific question.
- Next, click the Show more settings.
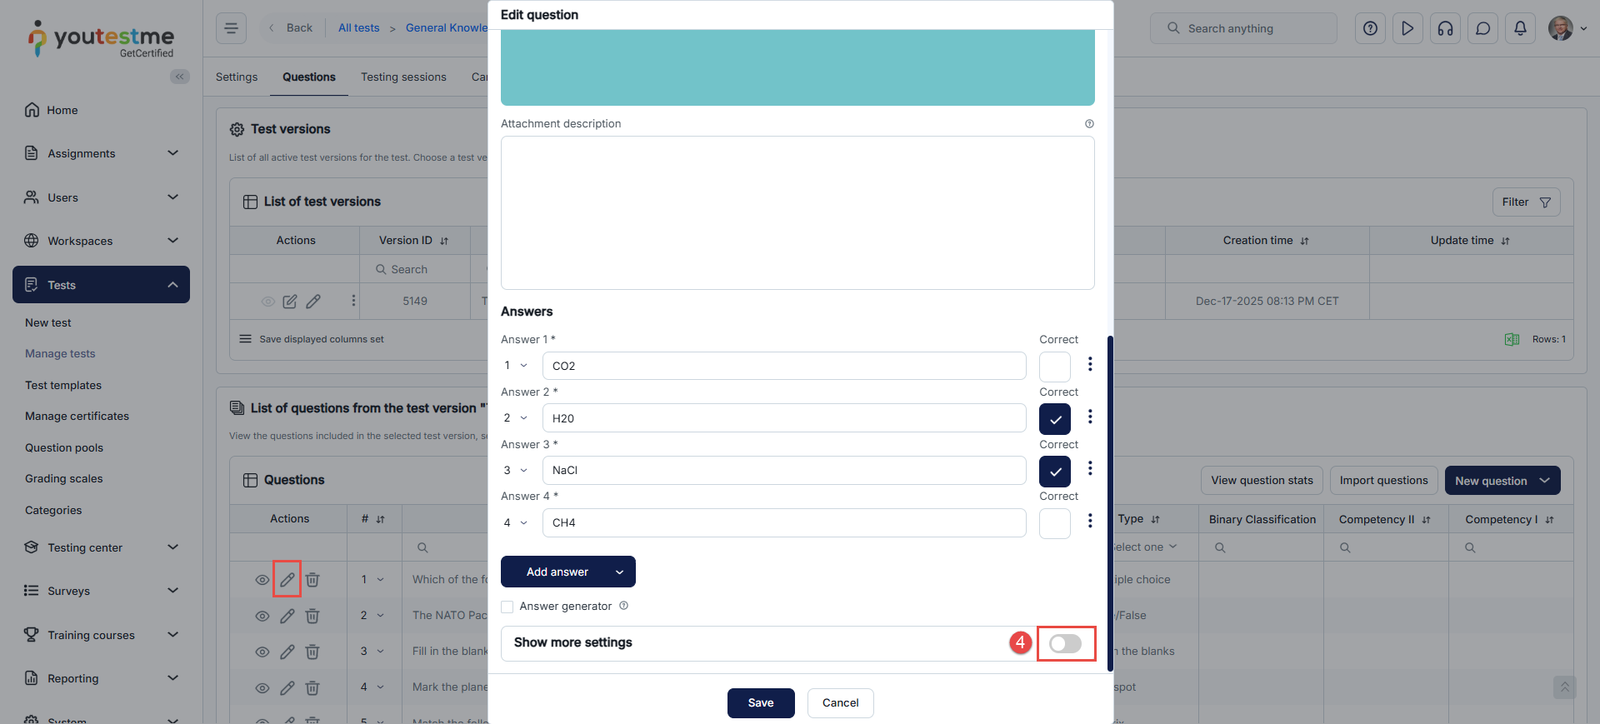
- Scroll down to the Question group option, click the vertical three-dots icon, and then click New.
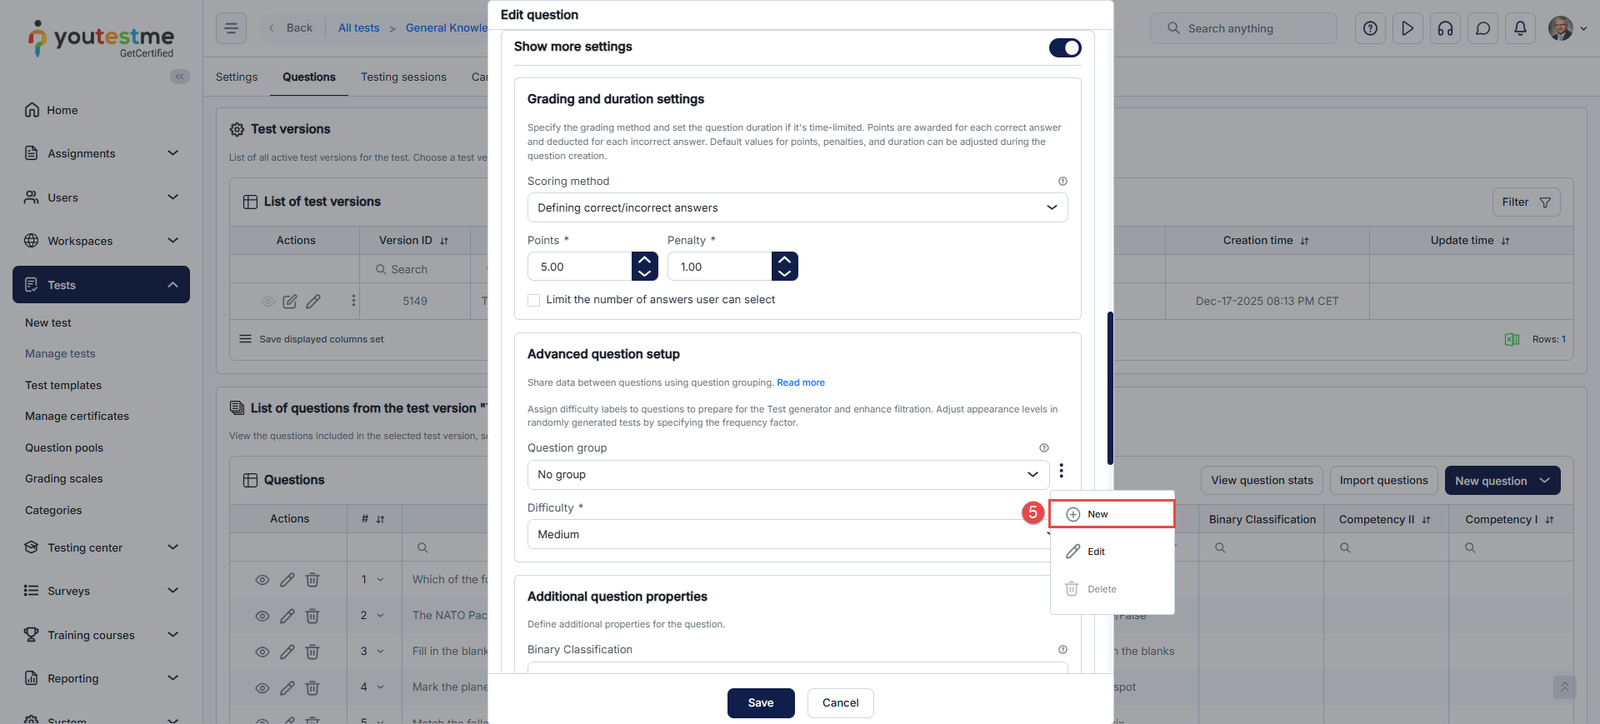
- A pop-up will appear where you can:
- Define the Group name.
- Text that will be displayed above each of the questions within that group (optionally).
- Upload a file that will be displayed above each of the questions within that group (optionally).
- Save the new question group.
Editing or Deleting Question Groups
- Editing: If you edit a question group from one question, the changes will automatically apply to all questions within that group.
- Deleting: Similarly, deleting a question group from any question removes it from all questions in the group.
Steps to Edit a Question Group:
- Go to the Questions tab of the manually created test.
- Click Edit Questions and select the specific question.
- Click Show more settings.
- Scroll down to the Question group section.
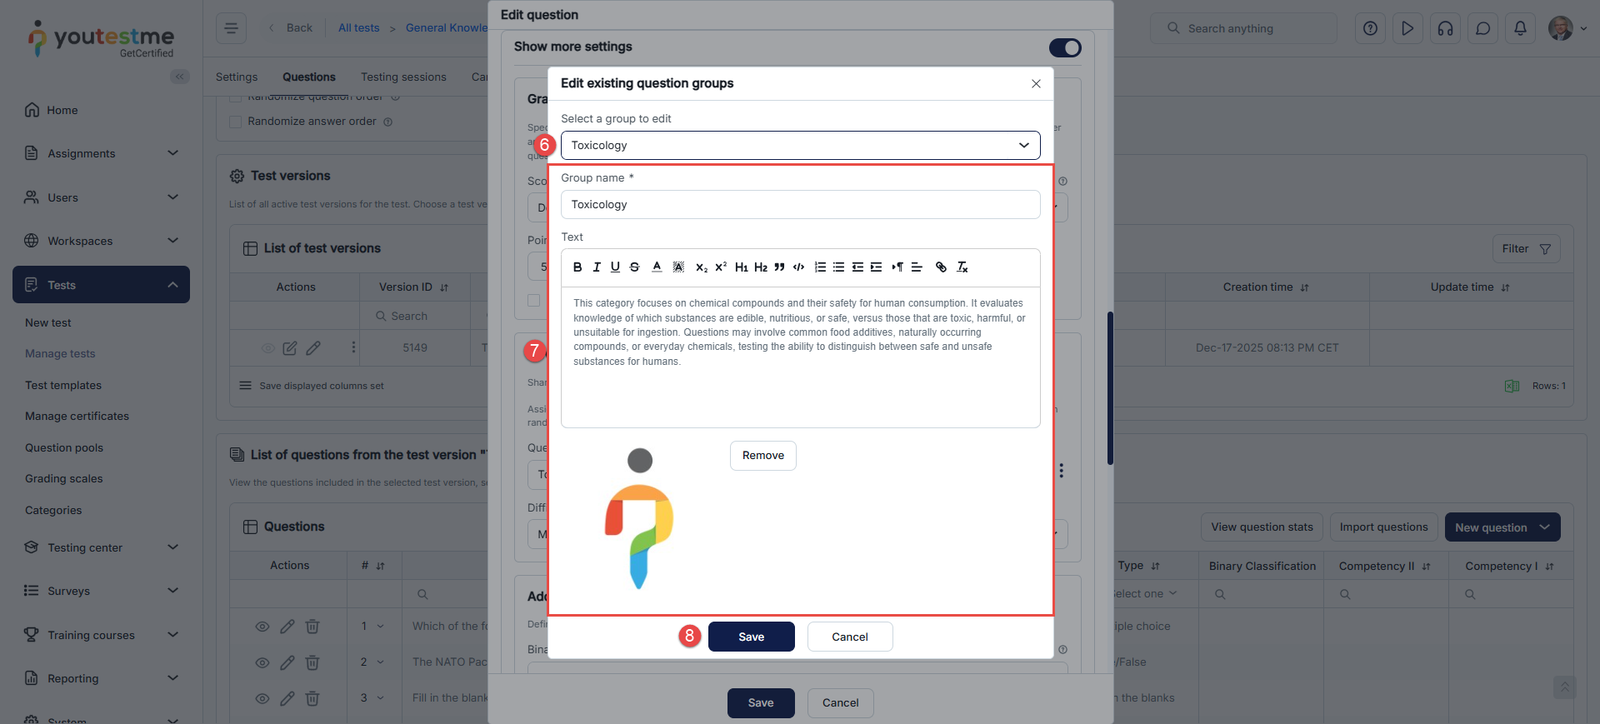
- Click the vertical three-dots icon and select Edit.
- In the pop-up window, choose the group you want to edit.
- Make the necessary changes (group name, description, or multimedia).
- Click Save to apply the changes.
Steps to Delete a Question Group:
- Go to the Questions tab of the manually created test.
- Click Edit Questions and select the specific question.
- Click Show more settings.
- Scroll down to the Question group section.
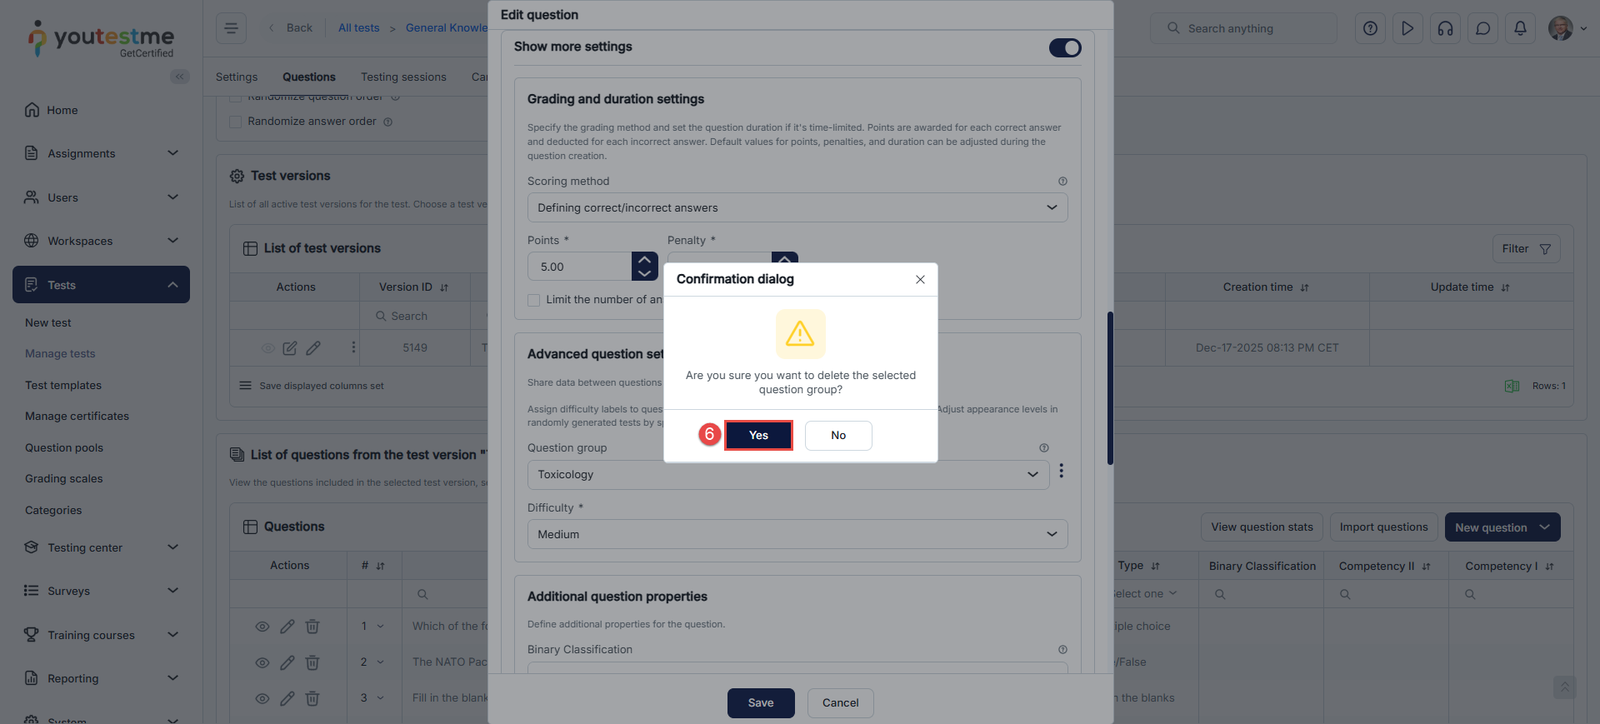
- Click the vertical three-dot icon, then select Delete.
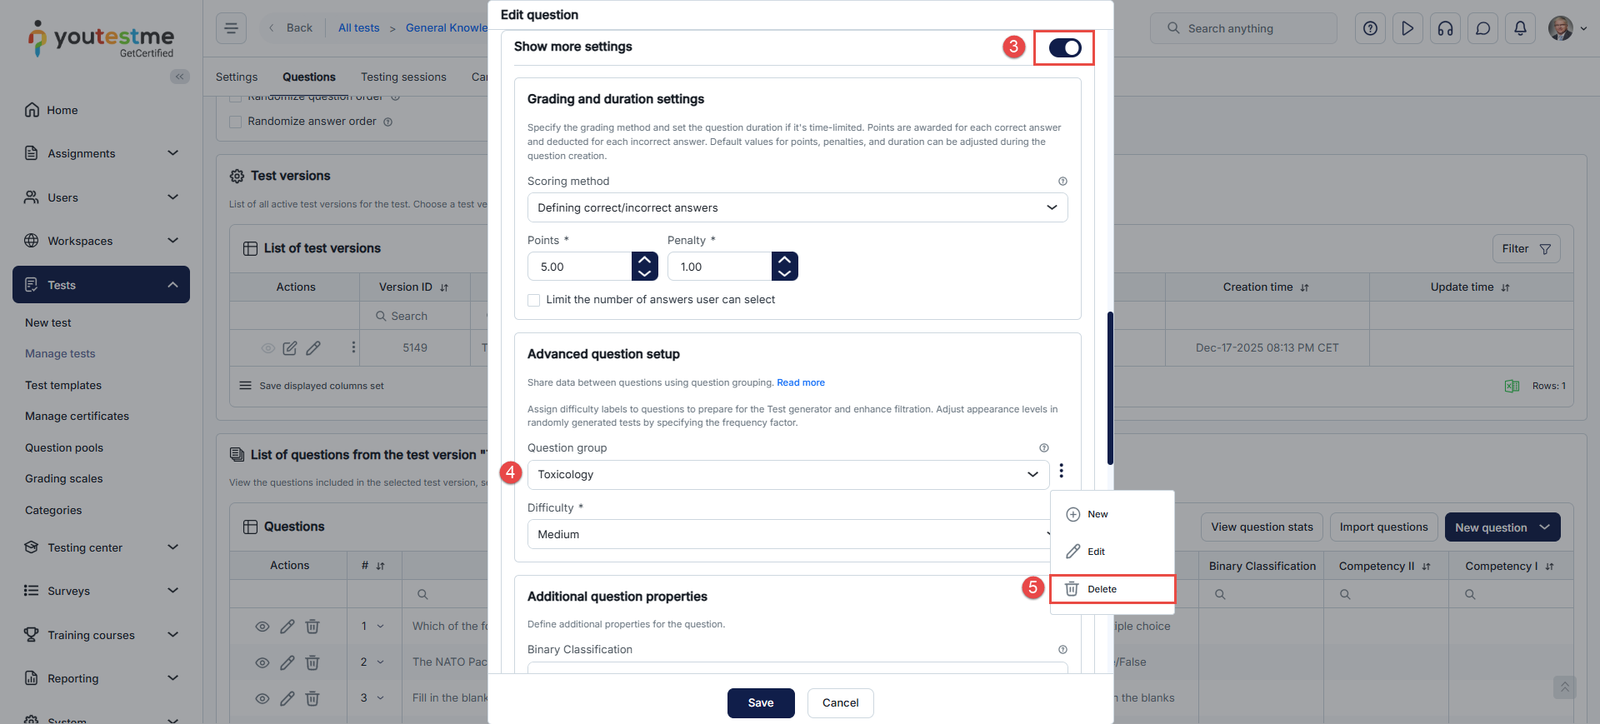
- A confirmation dialog box will appear. Click Yes to confirm.
Note: Editing or deleting must be done through the questions themselves; there is no separate interface for managing question groups outside of questions.
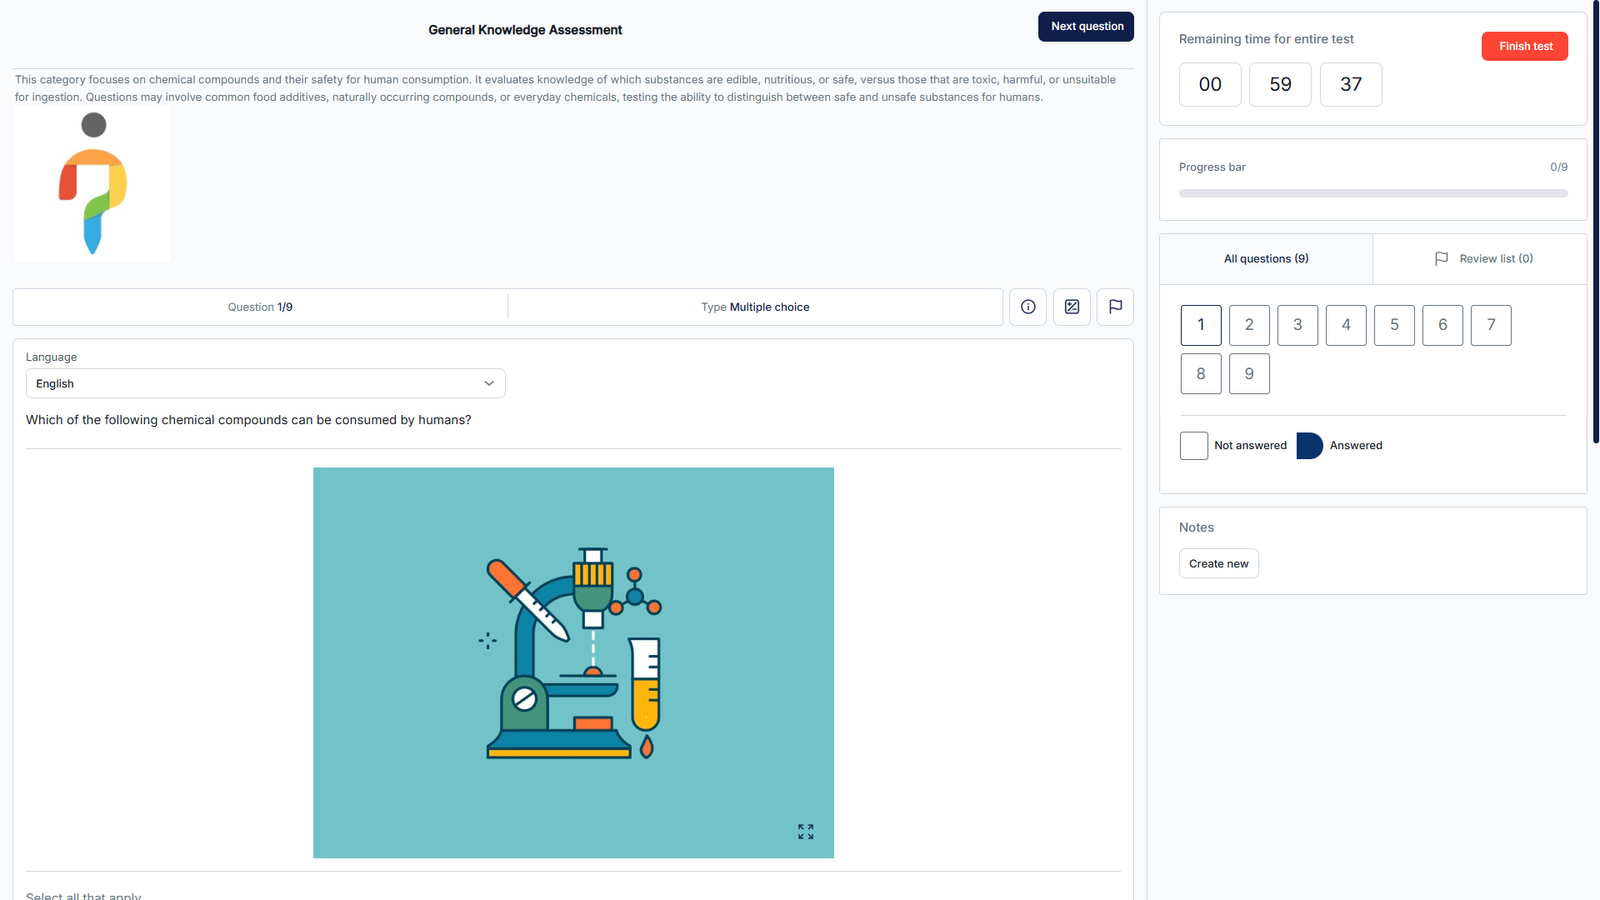
Candidate’s Perspective
During the test, candidates will see the question group title, description, and any uploaded multimedia above each question within the group.