This article explains how to adjust the report builder format and header names.
To see how to use Report Builder, please see How to Create Custom Reports Using Report Builder article.
Accessing the Report Builder #
Select the Reporting tab in the left-side menu and choose the Report builder tab option.
- You will see the list of all tests. Use the search box to find the test you want to preview.
- Click on its name to open it.
Report Builder Before Adjusting #
- The Group columns option is checked by default, and when displaying the report, columns will be grouped
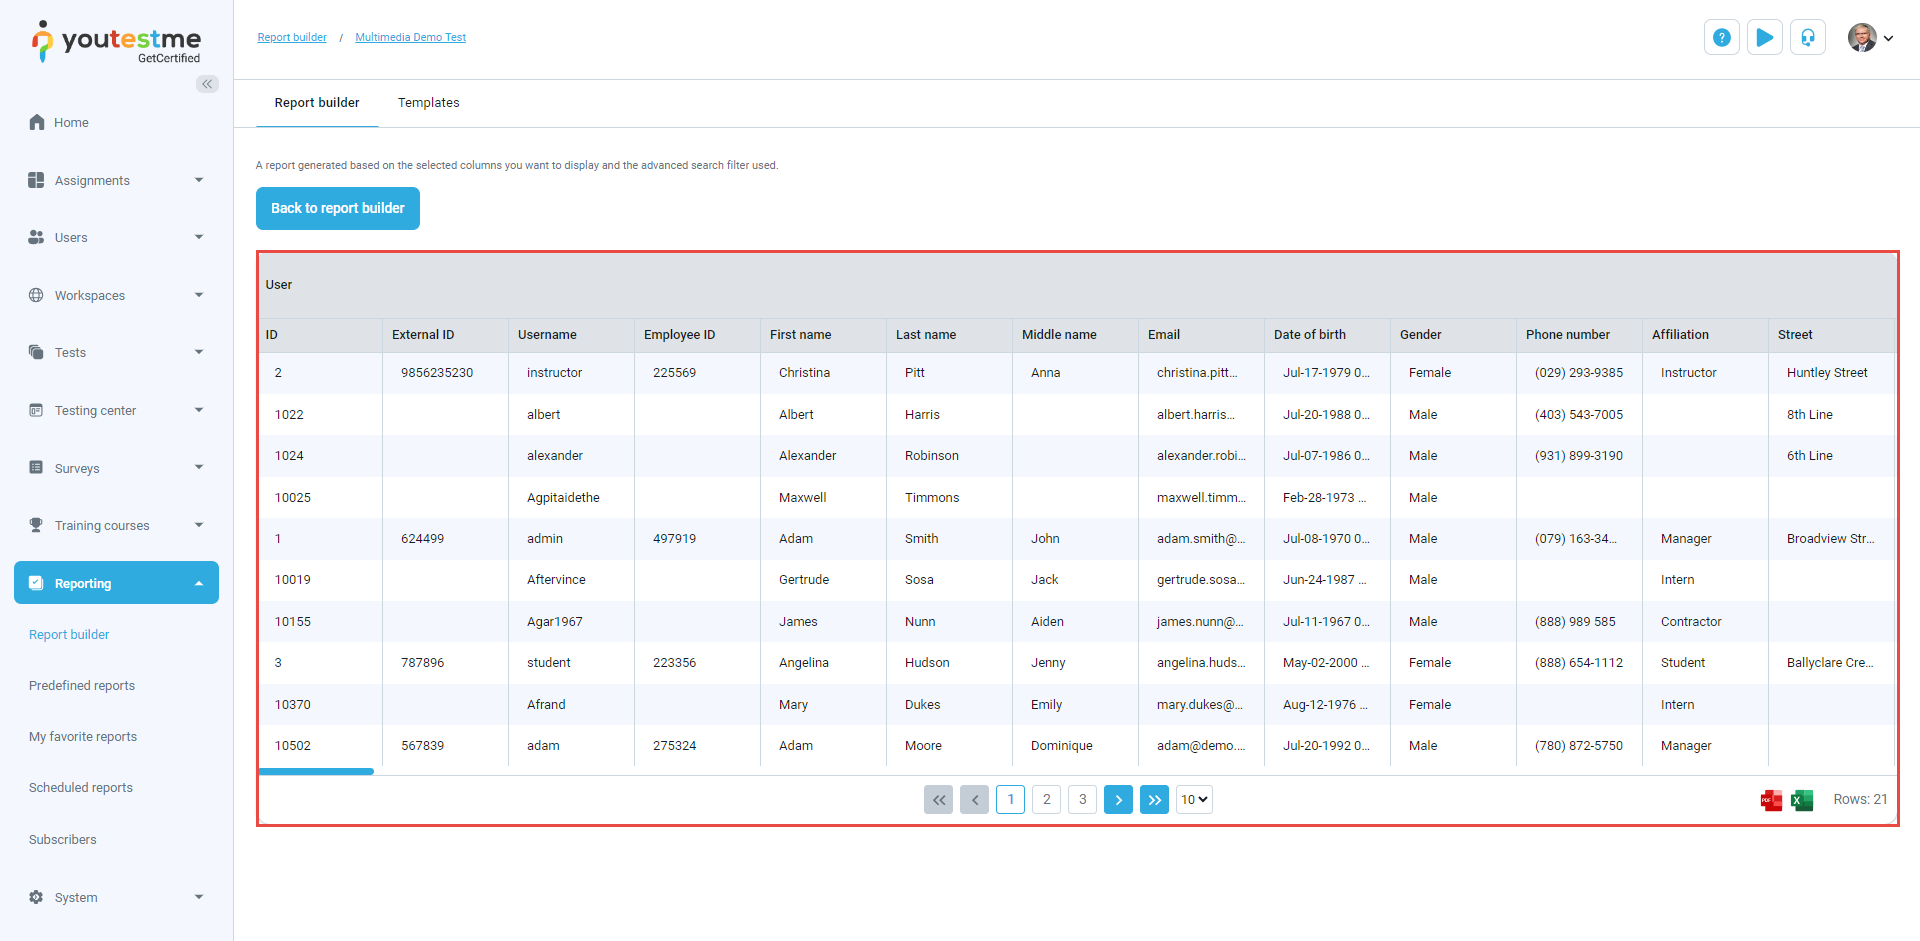
- Click Display report to see an example of the report when columns are grouped.
As you can see, all columns related to user information are grouped within the User category.
Adjusting the Report Builder #
If you want to adjust the Report Builder Format per New Samples and exclude the columns grouping
- Uncheck Group columns.
- Check the columns represented in the screenshot below.
- Click on Edit column titles.
Adjusting Header Names #
You can use the Custom title column to change the header’s name according to your preferences.
You can use parameters expressed between $ sign to get the exact name of the pool and add anything static before or after.
Saving Adjusting as a template #
You can save everything you have configured and use it as a template for the next test. Click on Save as and choose:
- To create a new report template.
- Save as existing report template.
- Enter the name of the template.
- Click the Save button.
Preview of the Adjusted Report Builder #
- First, click on the Load template dropdown and then find the previously saved template
- Click the Display report button.
Therefore, columns are not grouped anymore, and the column headers are presented according to your changes.
Select the Excel or PDF icon to download the report.


