

Article verified for Release 16.1 on June 10, 2026.
This article explains how to configure support contacts and support forms in the application, including support configuration at both system and workspace level.
The behavior of support forms depends on whether the workspaces module is used or not:
- When the workspaces module is not used – Support forms function at the system level only. All active support forms are available globally and are displayed to users both on the login page and throughout the application. There is no workspace-level assignment.
- When the workspaces module is used – Support forms can be assigned to specific workspaces, allowing different workspaces to offer different support options to their users.
Setting up support contact form
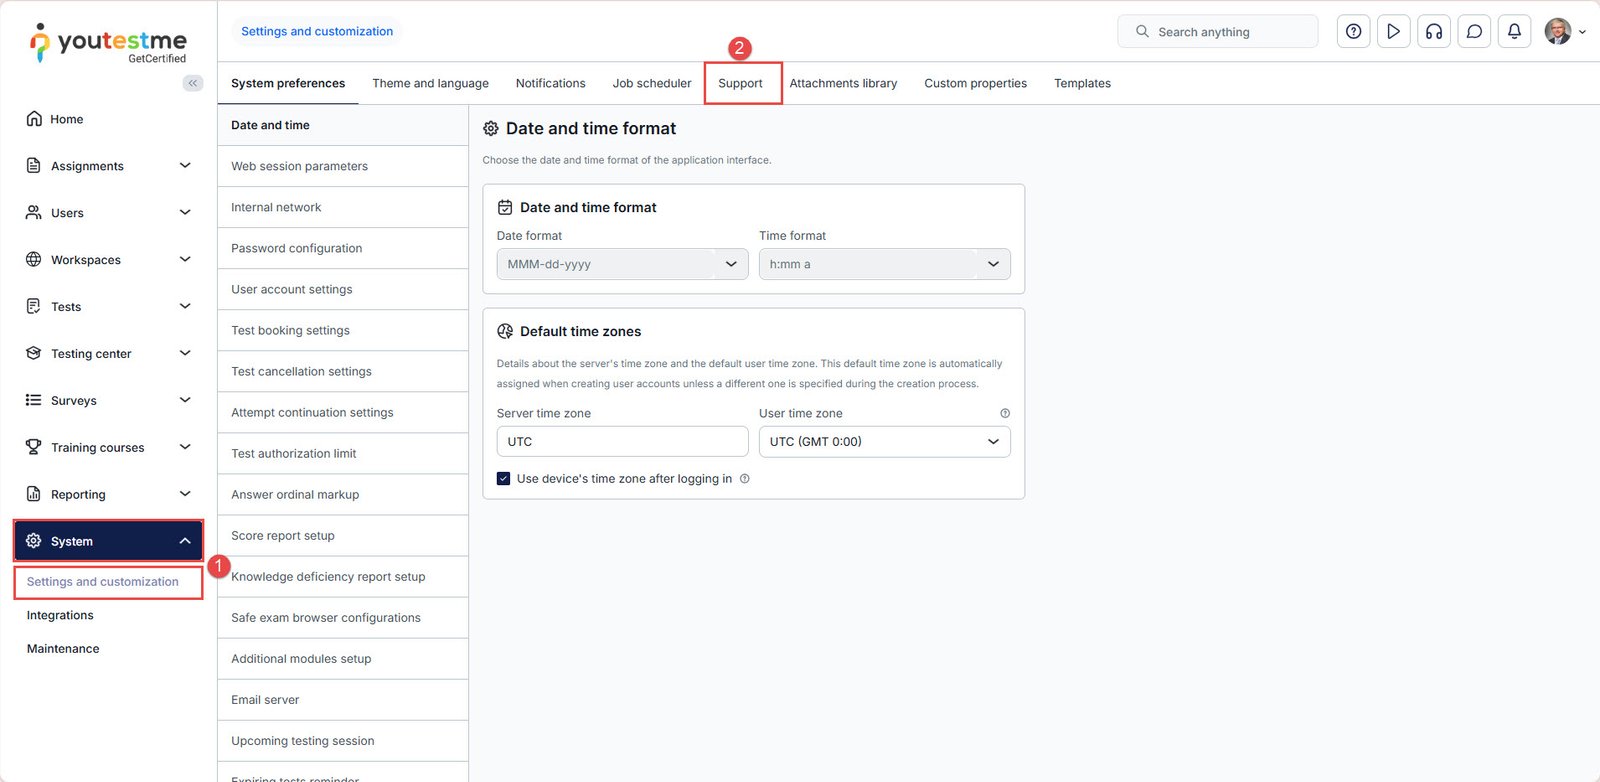
To set up contact emails,
- Navigate to “System/Settings and customization.”
- Navigate to the “Support” tab.
You will need to fill in the following fields to contact system support from the home page successfully:
- Purpose of mail – Describe the purpose of an email and phone call.
- Email – Provide the desired support email address. The first “Email” field is mandatory and will serve as the default email address.
- Phone number – Provide the desired support phone number.
- Additional info text– Here, you can provide useful details about why you contacted the support. For example, what is the expected time for an email response to the customer’s issues or business hours when support is available, etc.
- Confirm – Save the changes.
- Cancel – Cancel the changes.
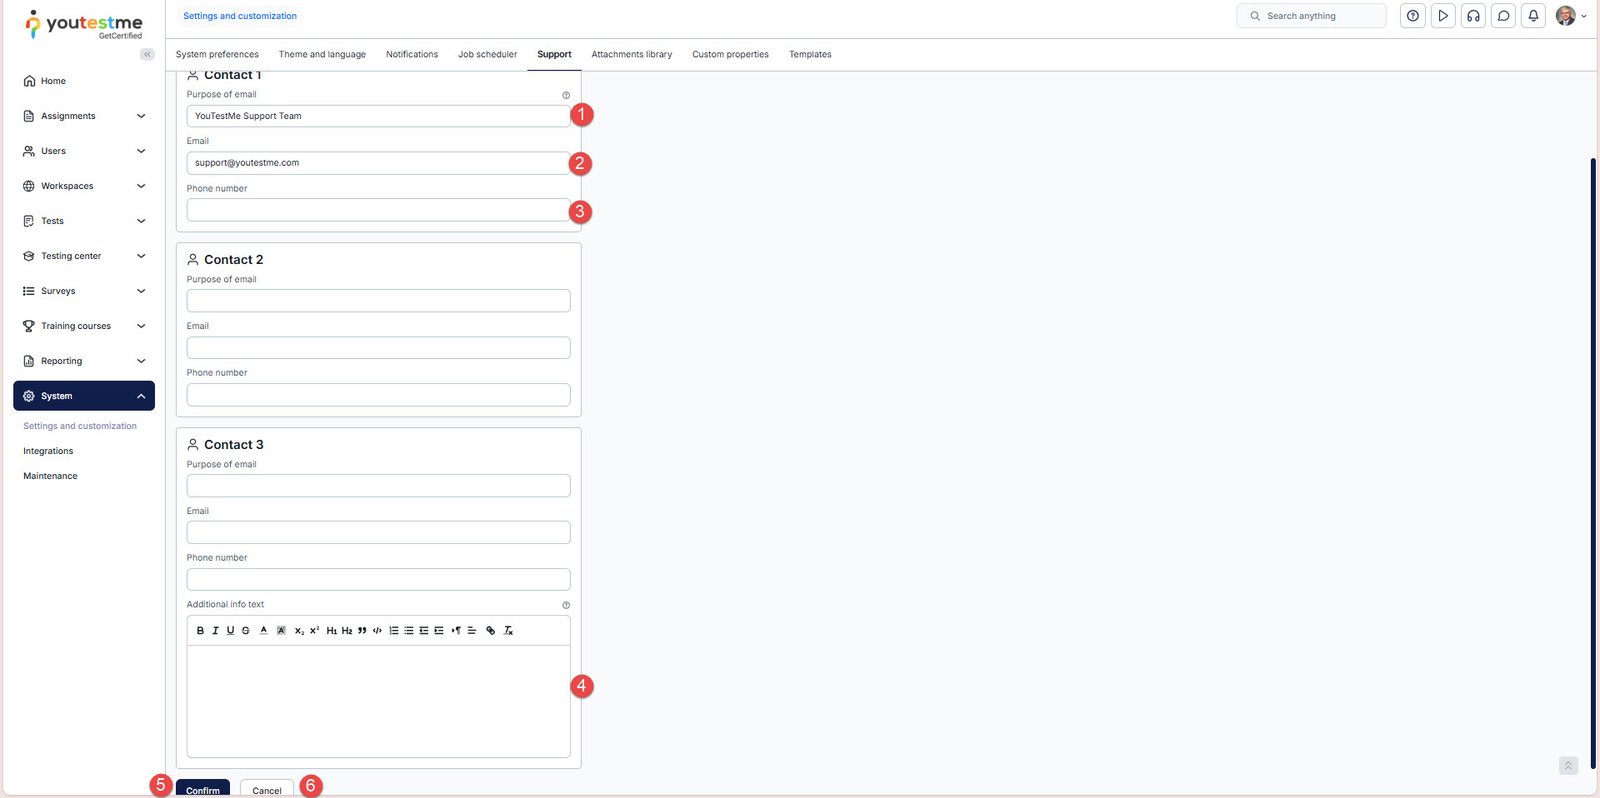
You can add up to 3 contacts for users to choose from. However, at least one support contact must be configured.
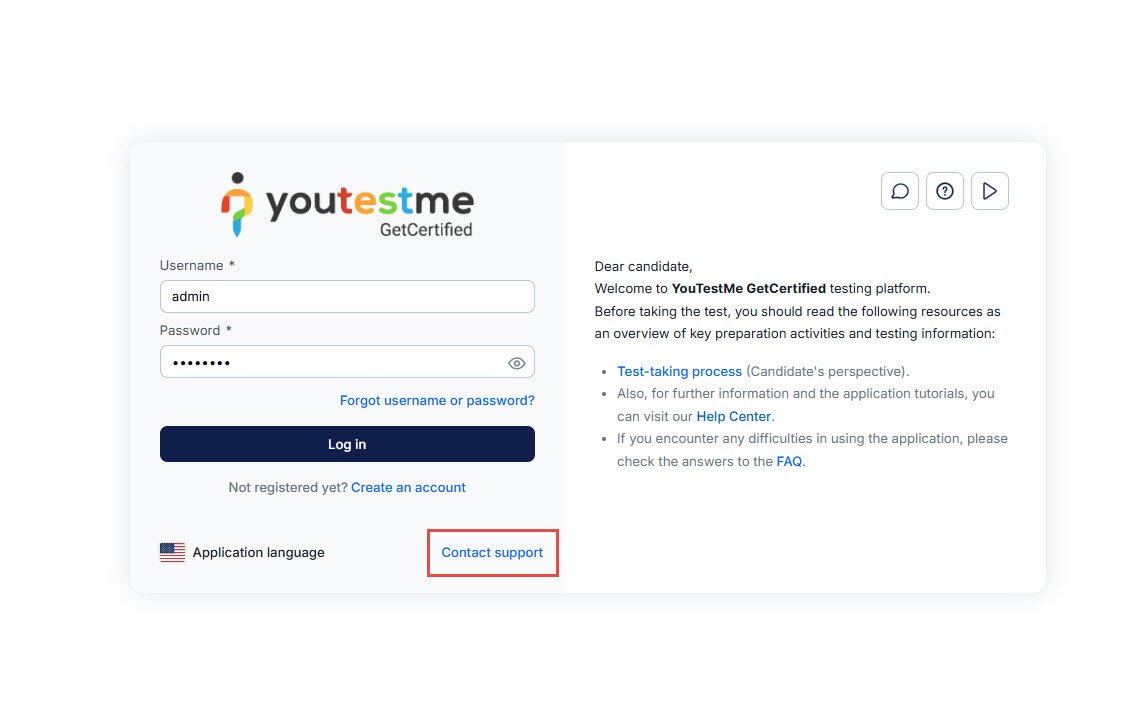
Support can be contacted from the login page.
Setting up support contact form for workspace
When the Workspaces module is in use, support forms can be assigned to specific workspaces. This allows different workspaces to provide different support options to their users.
Note: Support forms that have not been assigned to any workspace are treated as system-level forms. These are displayed on the login page and throughout the application to users who are not assigned to any specific workspace.
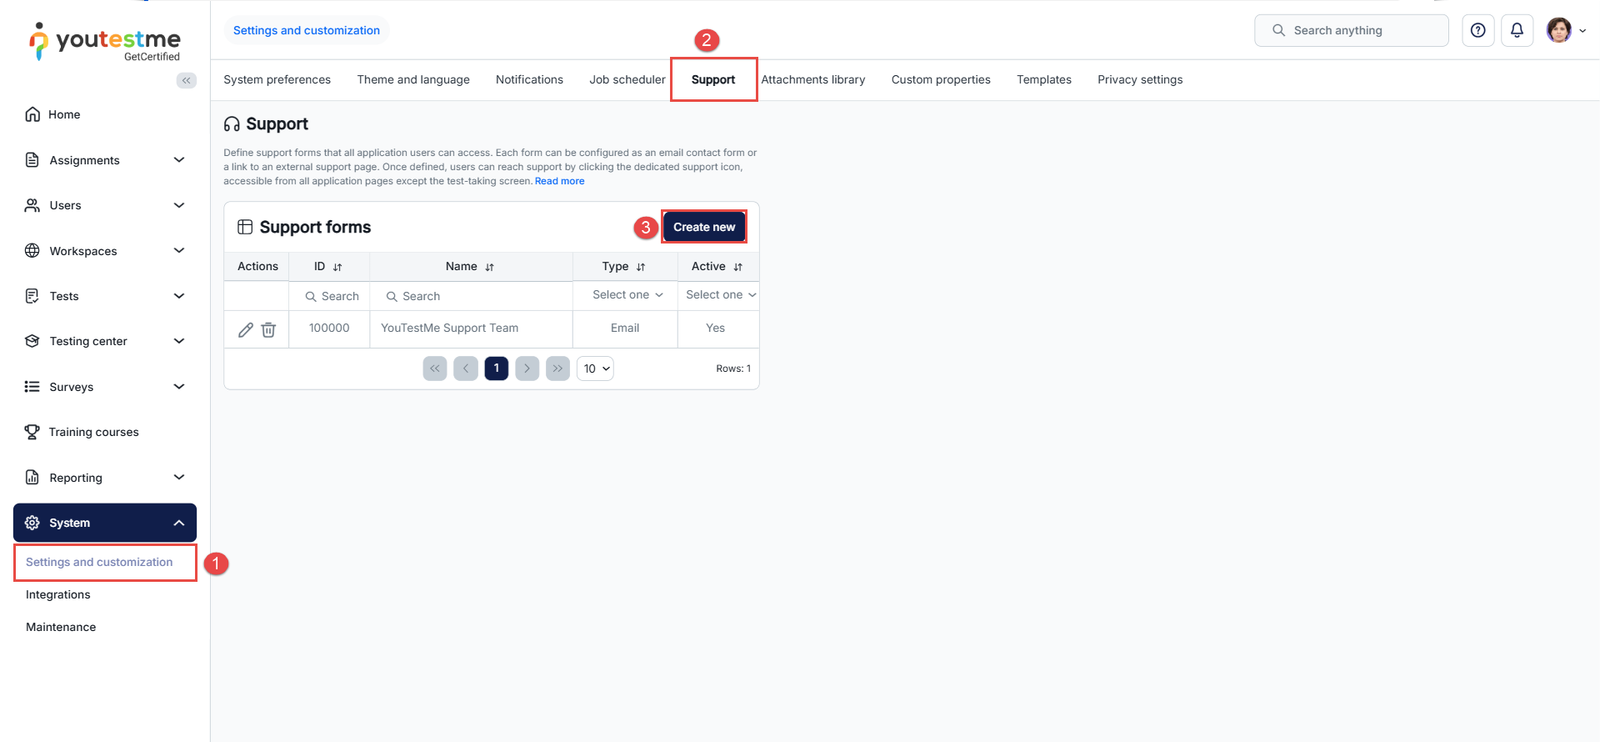
To create a support form:
- Navigate to System → Settings and Customization.
- Open the Support tab.
- Click Create New.
When creating a support form, select one of the following types:
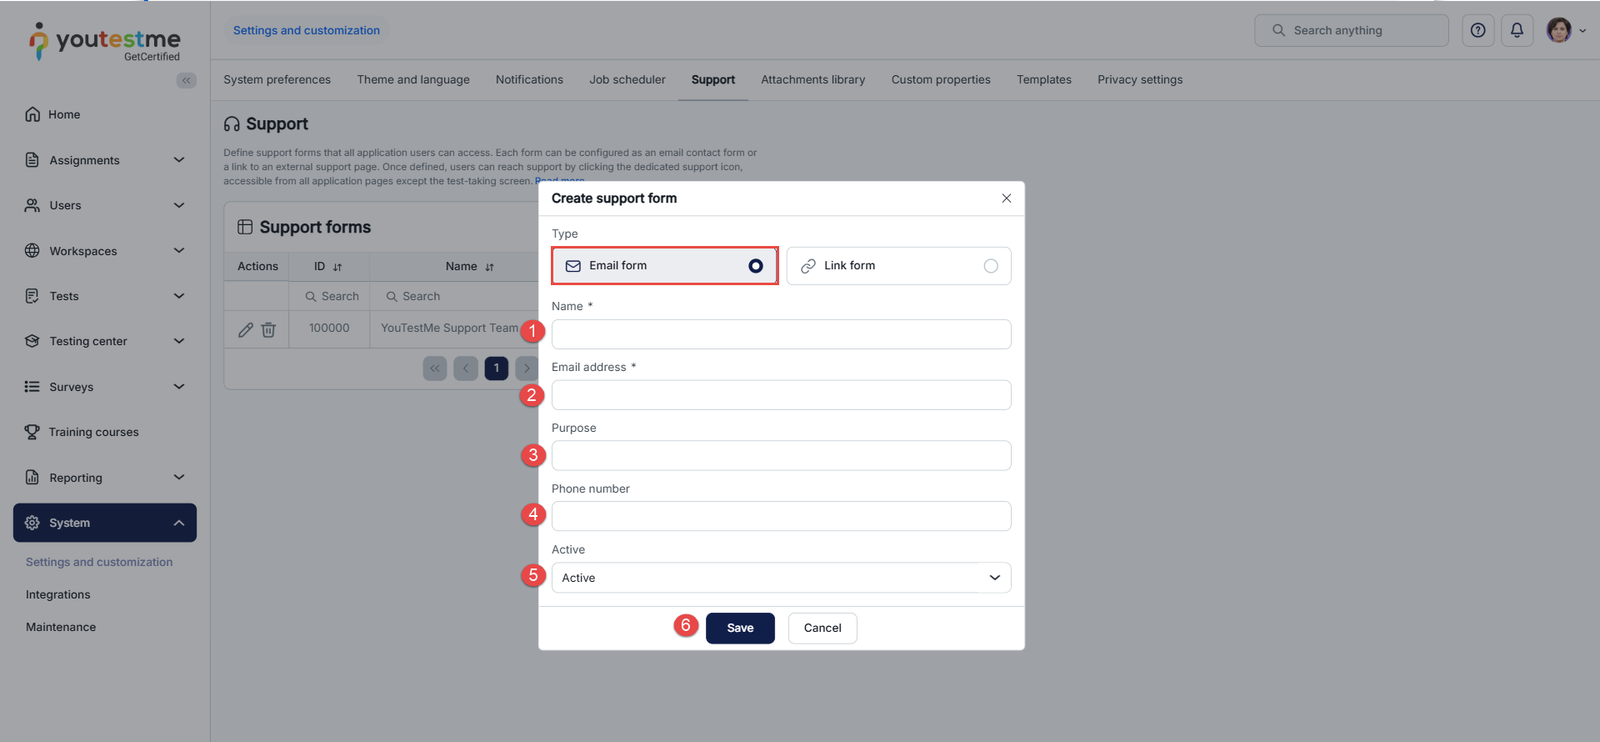
Email Form
An Email form opens a support request dialog within the application.
The following fields can be configured:
- Name – The display name of the support form.
- Email Address – The email address that will receive support requests.
- Purpose – A short description of the support service or contact purpose.
- Phone Number – An optional contact number displayed to users.
- Active – Determines whether the support form is available for use.
- Save – Creates the support form and stores the configured settings.
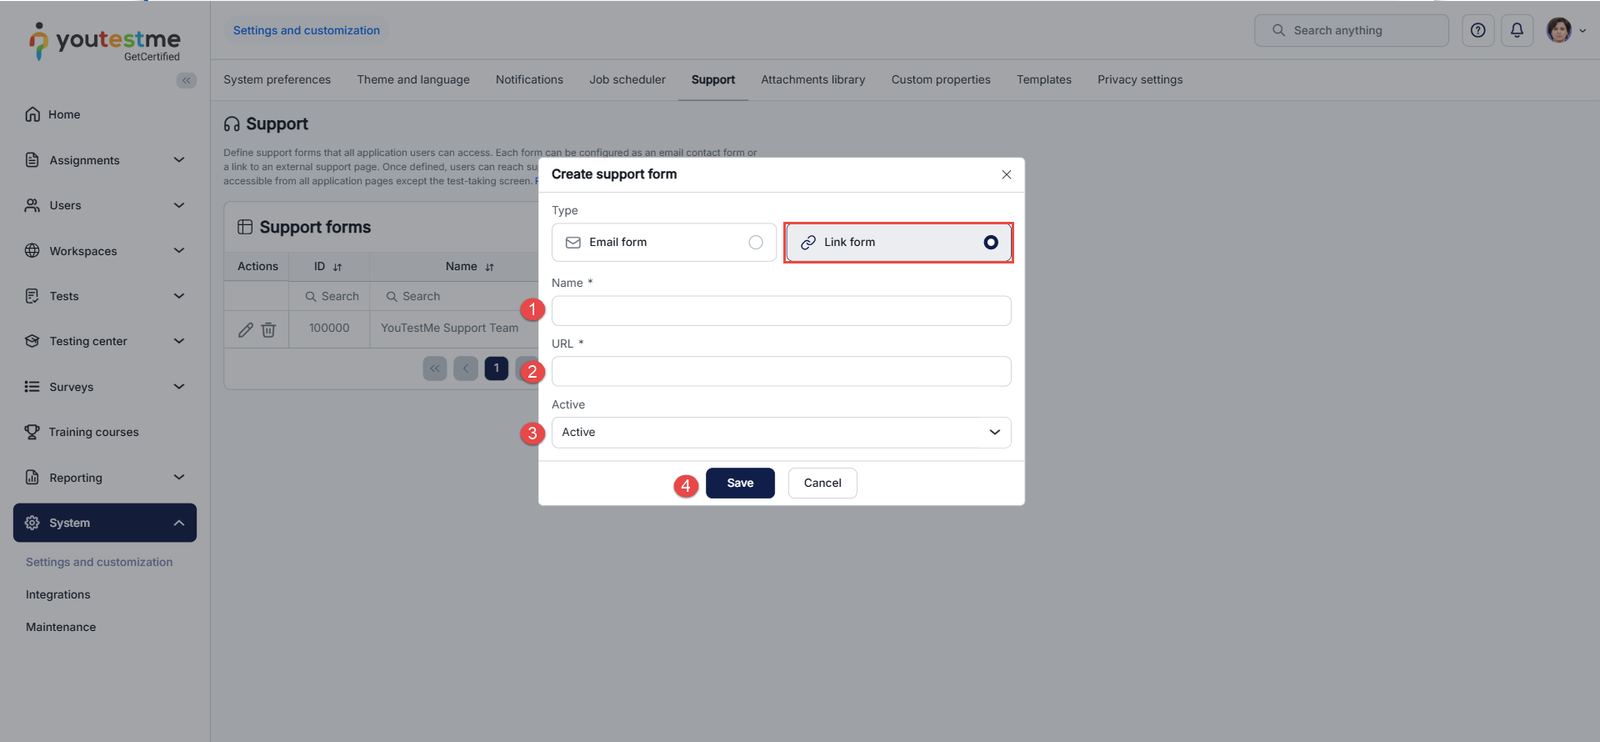
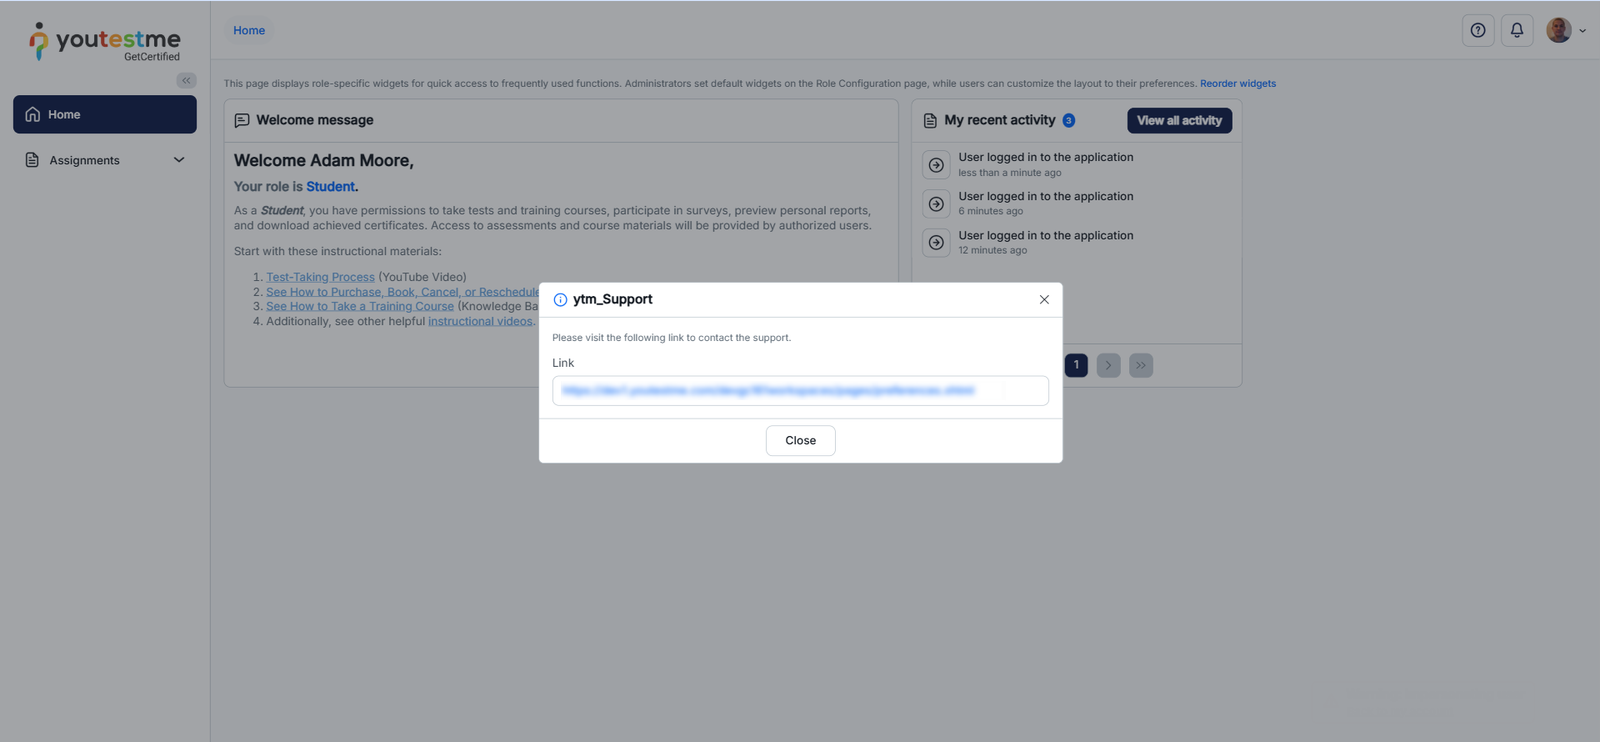
Link Form
A Link form redirects users to an external support page.
The following fields can be configured:
- Name – The display name of the support form.
- URL – The external support page or website link.
- Active – Determines whether the support form is available for use.
- Save – Creates the support form and stores the configured settings.
Once created, support forms can be reused across multiple workspaces.
Workspace Manager Perspective
Workspace Managers can determine which support form is available to users within their workspace.
To assign a support form:
- Open the desired workspace from Workspaces → Manage workspaces.
- Select the Information tab.
- Locate the Support form field.
- Select the desired support form.
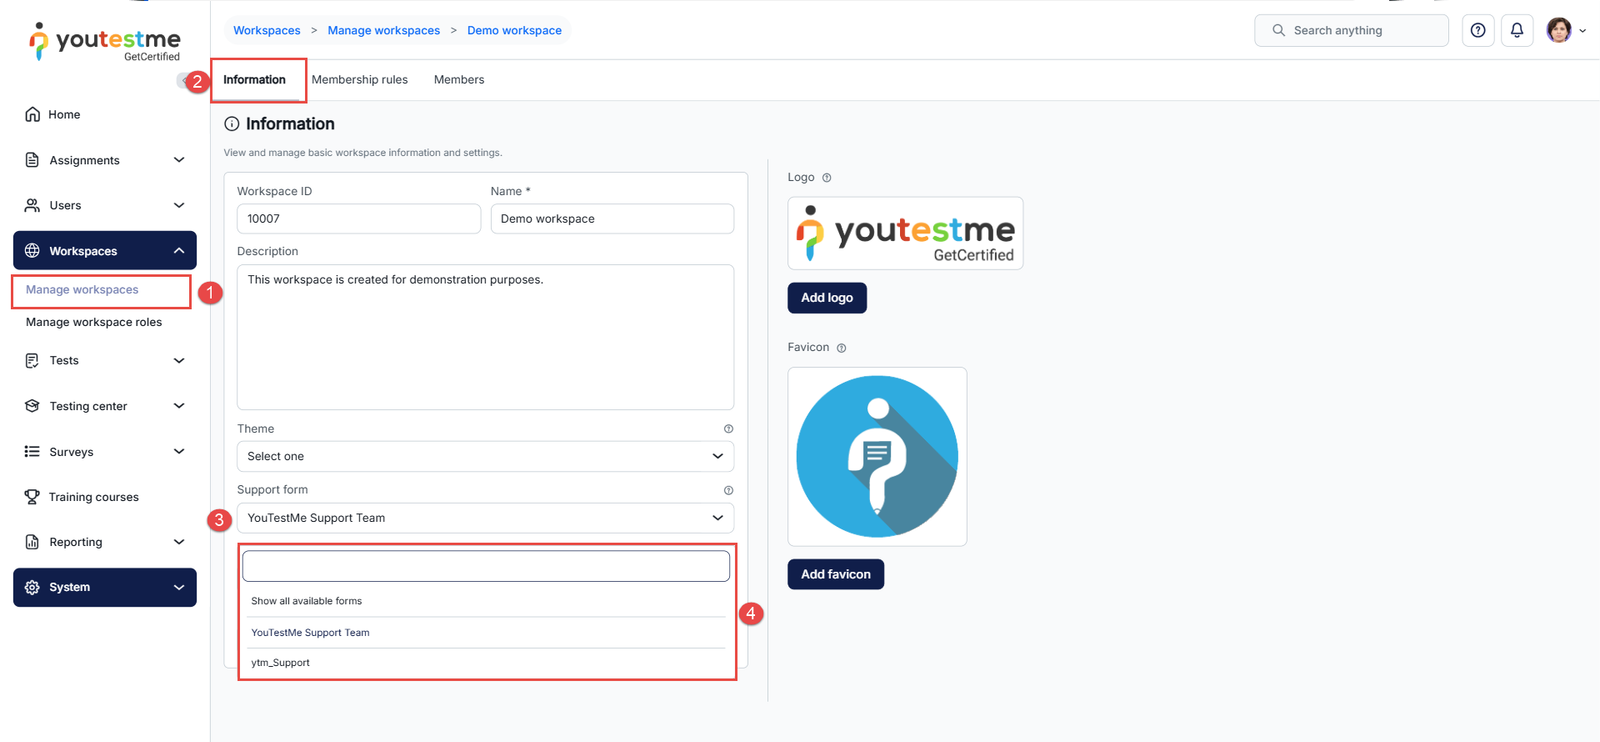
Each workspace can have only one active support form assigned at a time.
Workspace Managers can change the assigned support form whenever necessary.
User Perspective
Users can access support by clicking the Support button available throughout the application.
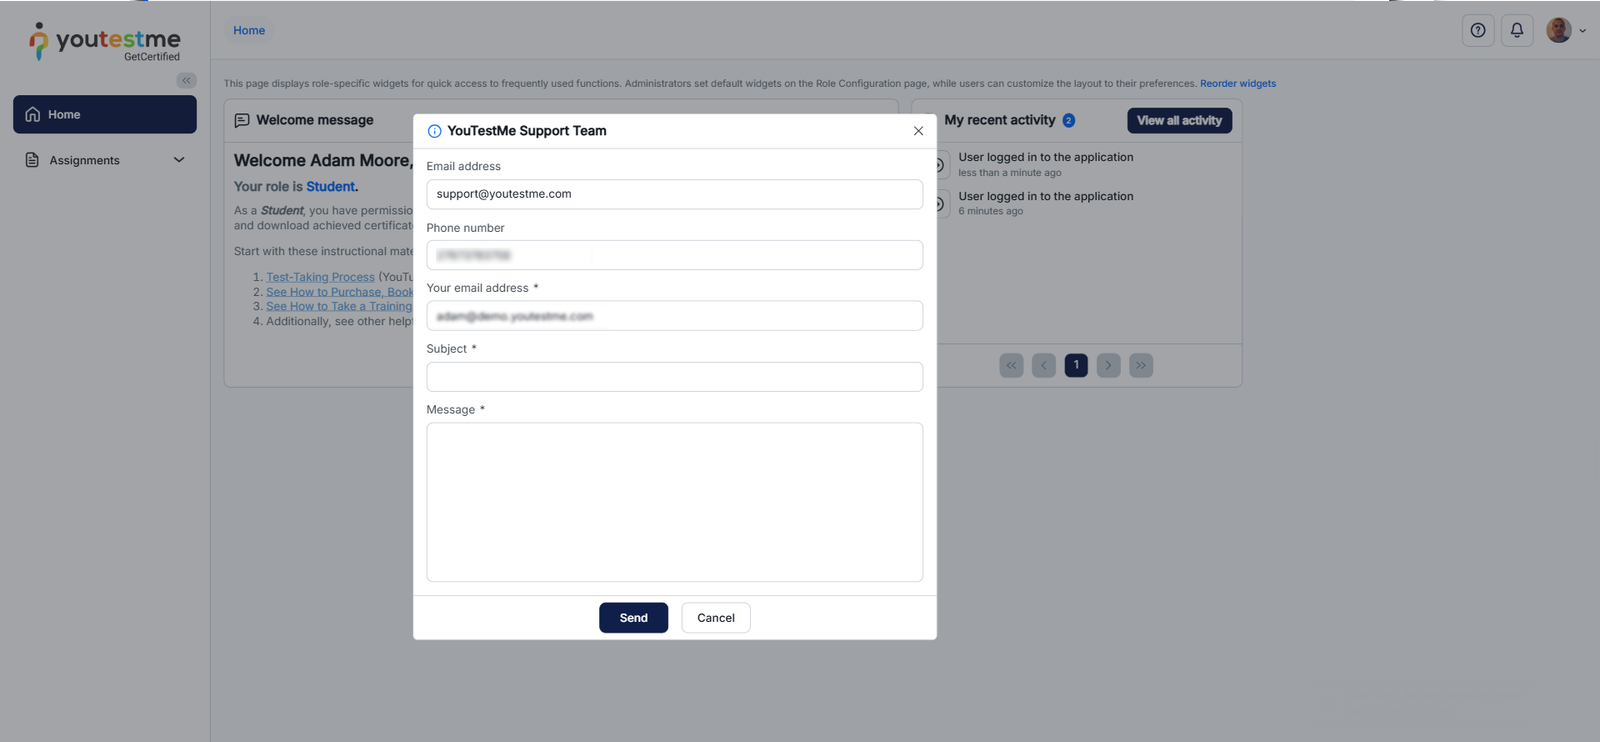
If a support form is assigned to the current workspace
The system automatically displays the assigned support form:
- For an Email Form, a support dialog opens where users can enter:
- Email address
- Subject
- Message
- For a Link Form, users are redirected to the configured external support page.
If no support form is assigned
Users must first select a support form from the list of available support forms before proceeding.
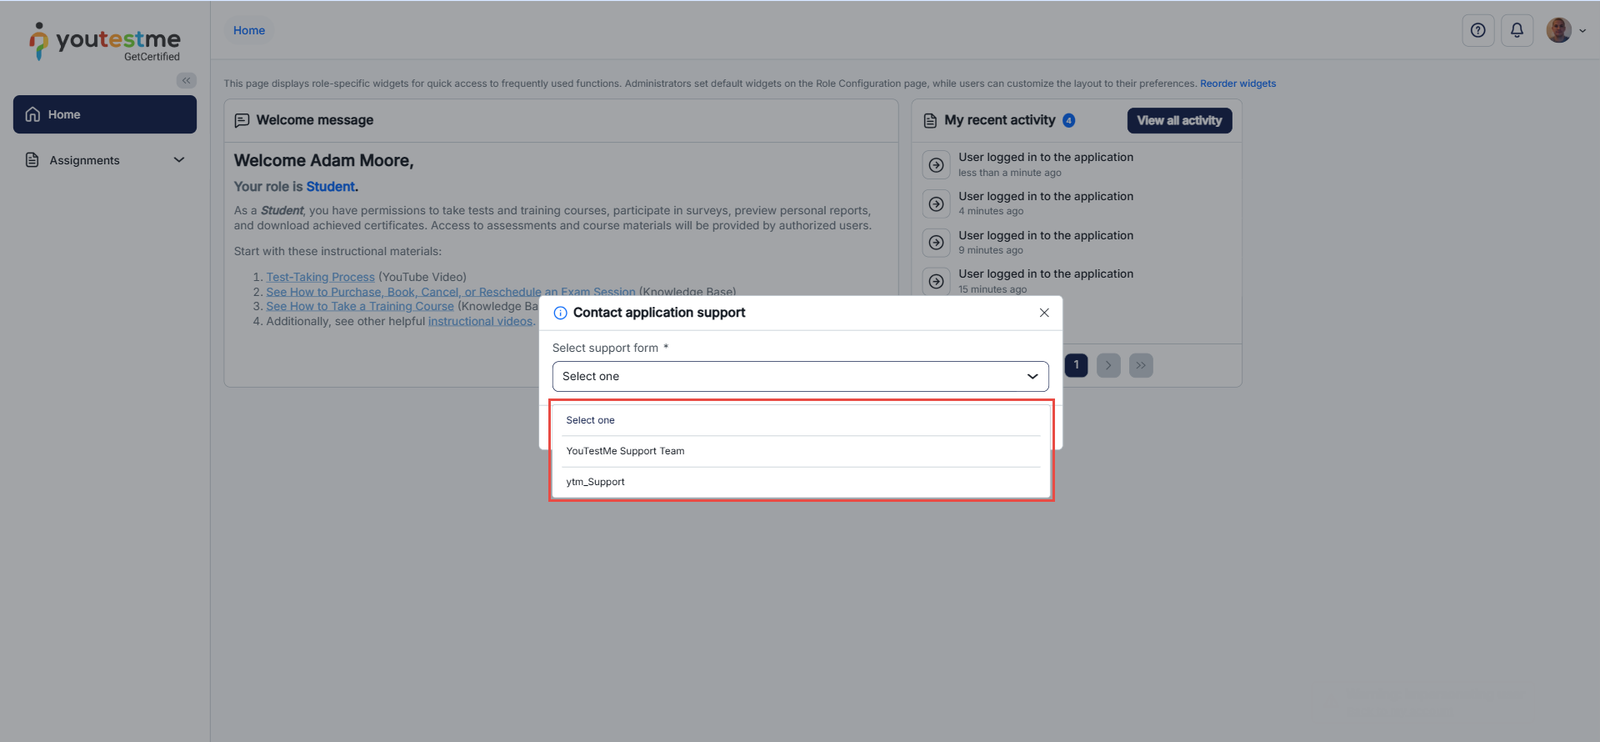
Note:If no support form is selected for the workspace, or if the user is not within a specific workspace context, the list of available support forms will be displayed when clicking the Support button. However, forms assigned to workspaces that the user does not belong to will not be shown.